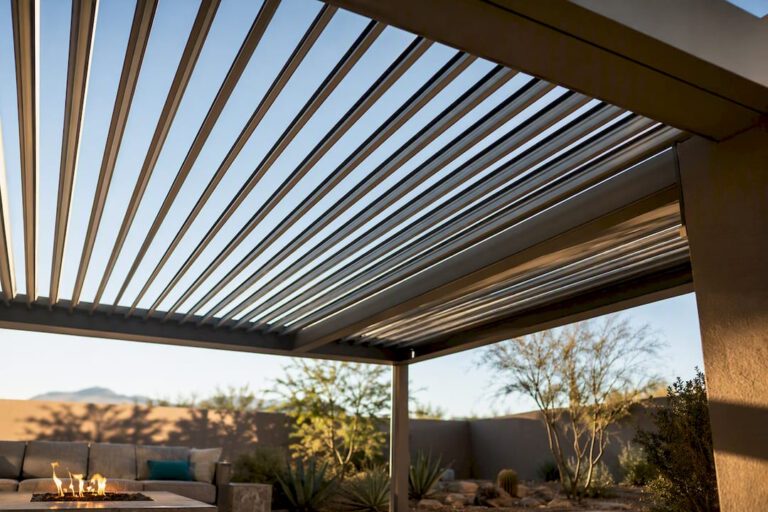
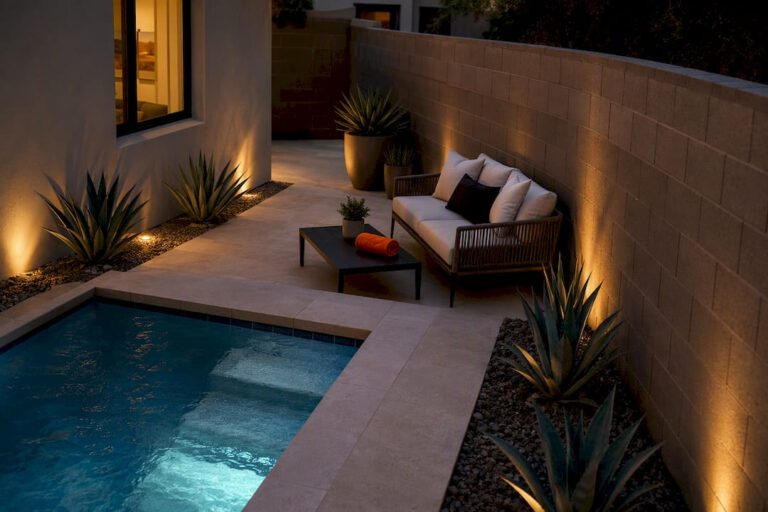
Seamless outdoor construction is the practice of designing and building a home so that interior living spaces flow directly into exterior ones, with no visual or physical interruption at the boundary. The result is a home that feels larger, brighter, and more connected to its surroundings. Done well, it is not a single product or feature. It is a coordinated set of design decisions, structural assemblies, and material choices that work together to dissolve the line between inside and outside.
For homeowners, the practical benefits are concrete:
- Expanded usable living area without adding square footage under roof
- Improved natural light and ventilation that reaches deeper into interior rooms
- Accessibility through flush, low-profile transitions that are easier to navigate
- Stronger property appeal and resale value in markets where outdoor living is a priority
- Year-round outdoor use when climate-adaptive design is built in from the start
The single most important first decision: determine whether your project can achieve a true flush threshold or whether a staged transition (a shallow step with a covered intermediate zone) is the right fit for your site, budget, and local drainage requirements. That choice drives nearly every structural and waterproofing decision that follows. Bring it to your first conversation with a designer.
Table of Contents
- What is seamless outdoor construction, and which design features create it?
- Which materials and systems make the connection durable?
- How do you keep an indoor-outdoor space comfortable year-round?
- How does landscape design reinforce the indoor-outdoor connection?
- What trades, permits, and coordination does this type of project require?
- What should you know about accessibility and threshold safety?
- What drives cost and how long does a typical project take?
- What mistakes do homeowners most often make, and how do you avoid them?
- What does research say about energy and wellbeing benefits?
- A practical checklist and questions to bring to your contractor
- Key Takeaways
- What experienced outdoor living contractors observe most often
- Useful sources and further reading
What is seamless outdoor construction, and which design features create it?
The features that produce a genuine indoor-outdoor connection are specific and recognizable. Knowing them helps you evaluate plans and spot gaps before construction begins.
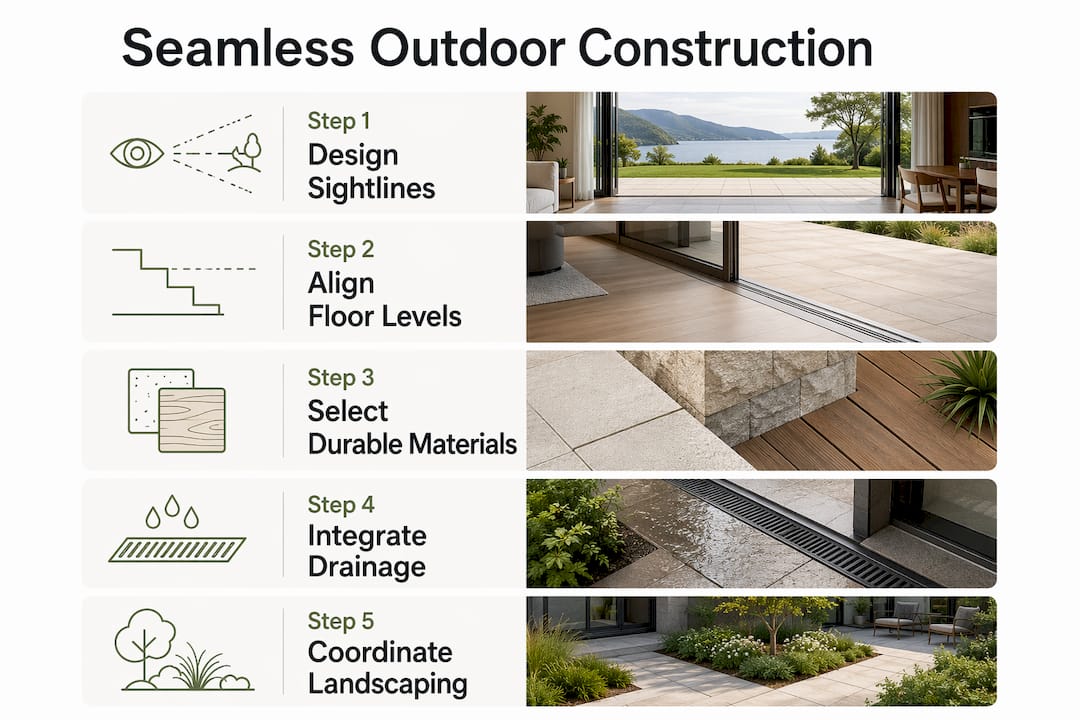
- Large, high-performance openings. Multi-slide, lift-and-slide, or folding glass door systems that span most of a wall are the most visible element. They remove the visual barrier and, when open, eliminate the physical one entirely. The frame profile matters: slim-frame or frameless glazing keeps sightlines clean.
- Consistent flooring across the threshold. When the same material, or a closely matched one, runs from the interior floor to the exterior deck or patio, the eye reads both areas as one continuous plane. Aligned grout joints or board directions reinforce the effect. Large-format porcelain, natural stone, and polished concrete all perform well in both environments.
- Covered intermediate zones. A deep overhang, covered terrace, or pergola between the interior and the open yard slows the transition and makes the outdoor area feel like an intentional room rather than a leftover space. This zone also provides weather protection that extends usability across seasons.
- Aligned sightlines and focal points. Sightline management often delivers more perceived continuity than expensive structural changes. Orient interior seating toward a single focal point outside, whether a specimen tree, a water feature, or a fire element, and the connection reads as deliberate.
- Ceiling and soffit continuity. Extending the interior ceiling plane to the covered exterior zone, using the same material or a complementary one, reinforces the sense that the two spaces belong together.
Pro Tip: If budget limits a full renovation, prioritize sightline alignment and a covered intermediate zone first. These two moves deliver the strongest perceived continuity per dollar and can be achieved without major structural work. Save the large glazing system for a second phase when the structural header and waterproofing can be properly planned.
Which materials and systems make the connection durable?
The visual effect of indoor-outdoor continuity depends on technical assemblies that are mostly invisible once construction is complete. Getting them right at the planning stage is far less expensive than correcting them after finishes are installed.
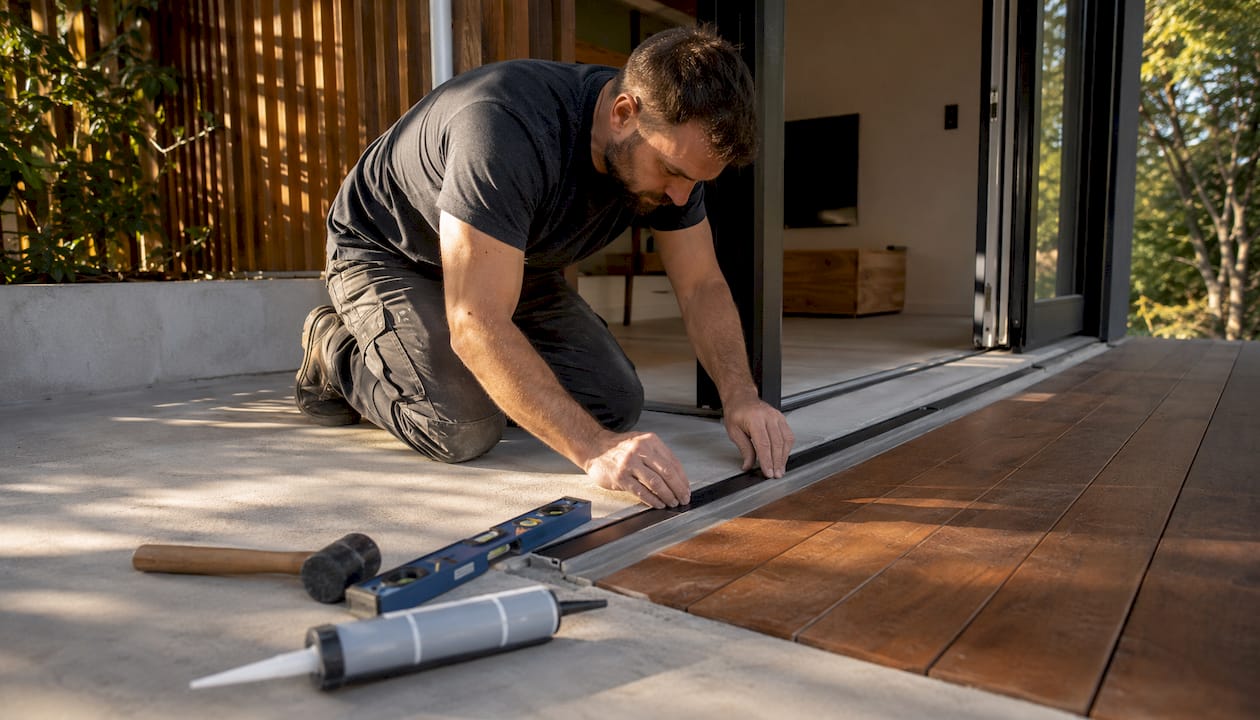
The one-plane sill method aligns interior and exterior finished-floor surfaces at the same elevation, treating the sill as an engineered watershed. This requires coordinated waterproofing, drainage, and framing decisions made before a single finish goes down. Designing the flush threshold at the framing stage, by anticipating finish thicknesses and using dropped joists or notched rim boards, is the most reliable way to guarantee a one-plane outcome long-term.
Flush transitions can be achieved without a step-down by combining threshold drainage systems, graded exterior surfaces, and integrated door-pan solutions, all while meeting waterproofing requirements. The key is that drainage must be designed into the assembly, not added afterward.
| System | What it protects or achieves | Specify for |
|---|---|---|
| Flush/low-profile door sill with sill pan | Prevents water intrusion at the threshold | New construction and full retrofit |
| Linear or trench drain at threshold | Manages surface water without a step-down | New construction preferred; retrofit possible |
| Continuous waterproofing membrane | Protects subfloor and framing from moisture | Any project with an exterior deck above grade |
| Exterior deck on pedestals or sleepers | Levels uneven slabs; allows drainage below deck | Retrofit over existing concrete |
| Matched flooring with rated exterior finish | Visual continuity; slip resistance outdoors | All projects |
| Structural header/beam for wide opening | Carries load when a wall is removed or widened | Any opening wider than a standard door |
How do you keep an indoor-outdoor space comfortable year-round?
Climate-adaptive design determines whether an outdoor room gets used three months a year or eleven. The strategies differ by region, but the underlying logic is the same: control sun, wind, and moisture at the architectural level before relying on mechanical systems.
- Shading and overhang depth. In hot-dry climates like Phoenix, a deep overhang (typically 4 feet or more on south and west exposures) blocks high-angle summer sun while admitting lower winter light. In temperate climates, adjustable shading, such as motorized louvered roofs, gives year-round flexibility.
- Operable screening. Retractable screens on large openings block insects and reduce solar gain without closing off the view. In humid climates, they also manage airflow to reduce moisture intrusion.
- Outdoor heating. Infrared heaters mounted overhead extend usability into cooler evenings without the bulk of a fireplace. In cold climates, a fully enclosed sunroom or a thermally broken glazing system may be the more practical solution.
- Ceiling fans. An exterior-rated ceiling fan in a covered zone moves air effectively in both hot and mild weather, reducing the perceived temperature without mechanical cooling.
- Insulating glazing and thermal breaks. High-performance glass with a low U-factor and appropriate Solar Heat Gain Coefficient (SHGC) reduces heat transfer through large openings. In high-wind or storm-exposed regions, climate-specific engineering including impact-rated glazing and corrosion-resistant hardware is a code requirement, not an upgrade.
For seasonal outdoor use, layering passive strategies (overhang, orientation, screening) with targeted mechanical ones (heaters, fans) keeps long-term operating costs lower than relying on mechanical systems alone.
Pro Tip: In arid climates, a misting system integrated into the covered zone can reduce ambient temperature by several degrees during peak summer hours. Pair it with a ceiling fan and the space becomes genuinely comfortable well into the afternoon, without air conditioning.
How does landscape design reinforce the indoor-outdoor connection?
Landscape is not decoration added after construction. In well-integrated projects, it is part of the spatial strategy from the first site visit.
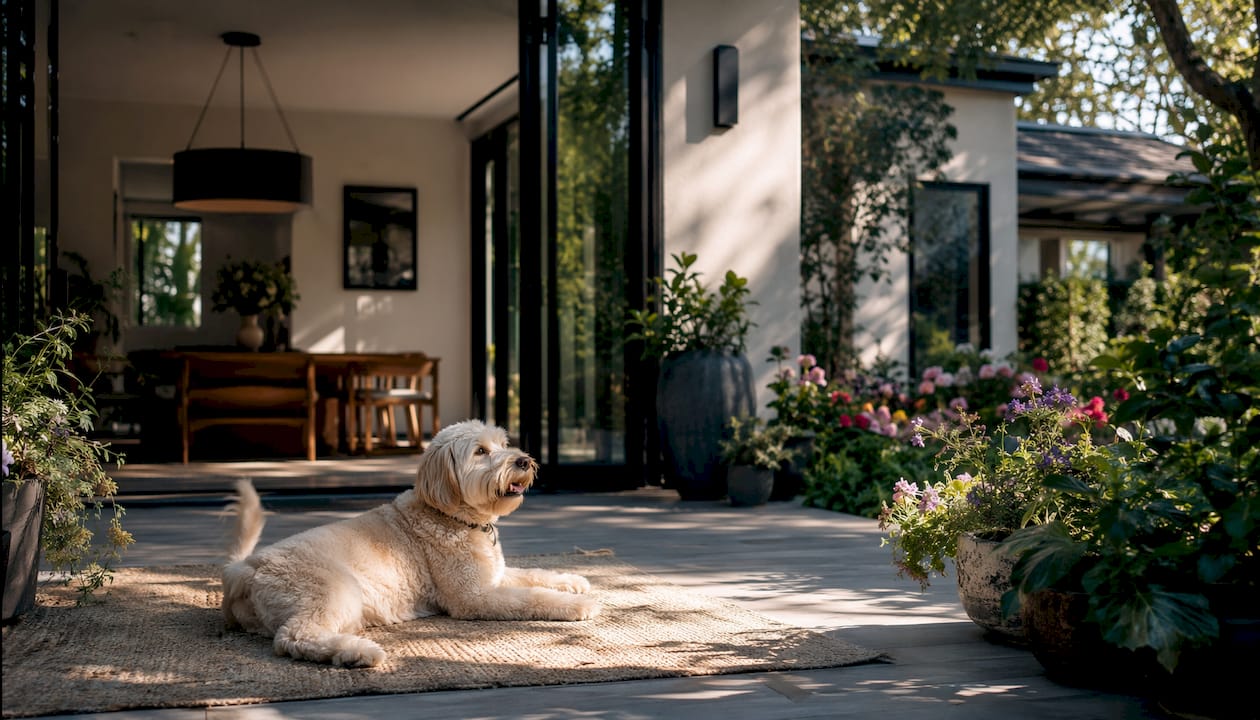
The concept of outdoor rooms, defined zones for dining, cooking, lounging, or gathering, works best when each zone aligns with the interior function it connects to. A covered outdoor kitchen placed adjacent to the interior kitchen creates a natural extension of the cooking and entertaining sequence. An outdoor living room positioned off the great room, with matched furniture scale and a shared sightline to a focal point, reads as a continuation of the interior rather than a separate area. Uniquecompanies designs these zones as part of an integrated plan, not as afterthoughts.
Planting choices reinforce or undermine the connection. Low, structured plantings at the perimeter of the outdoor room keep sightlines open. A single specimen tree or large-scale planting placed at the end of the primary sightline gives the eye a destination and anchors the outdoor space. Matching the material palette across the threshold, using the same stone or concrete tone in both the hardscape and the interior flooring, strengthens visual continuity without requiring identical materials.
On landscape and construction scope: landscaping is not automatically included in a new home construction contract. In most residential projects, landscape design and installation are a separate scope, often contracted after the structure is complete. For a truly integrated result, engage a landscape designer at the same time as the architect, not after the foundation is poured. The site grading, drainage routing, and planting zones all affect structural and waterproofing decisions made early in the project.
For outdoor kitchen design and outdoor living room configurations, defining the function of each zone before selecting materials or furniture is the step most homeowners skip, and the one that most affects long-term satisfaction.
What trades, permits, and coordination does this type of project require?
Seamless indoor-outdoor construction involves more trades than most homeowners anticipate. Misaligned sequencing between them is the most common source of cost overruns and finish defects.
- Architect or residential designer to develop the spatial strategy, specify materials, and coordinate drawings across all trades.
- Structural engineer to size headers, beams, and any modified framing for wide openings. No large glazing system should be installed without a signed structural drawing.
- Glazing specialist to supply and install the door or window-wall system, including sill pans, flashing, and weatherstripping.
- Waterproofing contractor to install the continuous membrane at the threshold and any exterior deck assembly. This is a separate scope from general carpentry and should be specified explicitly.
- Framing and carpentry to execute the one-plane framing, including dropped joists or notched rims where needed.
- Roofer and flashing installer to integrate the overhang or covered zone with the existing roof system without creating new leak paths.
- Plumber to rough in the linear or trench drain at the threshold and any outdoor kitchen or spa connections.
- Mechanical and electrical for outdoor lighting, heating, fans, audio-visual, and any smart controls.
- Landscape contractor for grading, planting, hardscape, and irrigation, ideally engaged before final grading is set.
On the permitting side, structural modifications for wide-span openings typically require a municipal building permit, plan review, and inspections at framing, waterproofing, and final stages. Glazing specifications, particularly U-factor and SHGC values, may be reviewed for energy code compliance. In high-wind or hurricane-exposure zones, impact ratings are a permit requirement. Build at least 6–10 weeks of permitting lead time into the project schedule before construction begins, and confirm local requirements with your building department early.
Questions to ask your contractor before signing:
- Who is responsible for coordinating the waterproofing scope between the framing, glazing, and roofing trades?
- How will the sill drainage be tested before finishes are installed?
- How will finished-floor heights be confirmed and guaranteed across all trades?
What should you know about accessibility and threshold safety?
Threshold design has direct implications for accessibility and safety, and both are governed by local building codes that vary by municipality.
A true flush threshold, where interior and exterior finished floors meet at the same elevation with no lip, is the most accessible outcome and the design target for most indoor-outdoor projects. Where a fully flush condition is not achievable due to drainage or waterproofing constraints, a very low-profile transition, kept to the minimum height the assembly requires, is the practical alternative. Accessibility guidance emphasizes keeping any lip height as low as possible to accommodate wheelchair users and people with limited mobility.
Slip resistance is a separate but equally important consideration. Exterior-rated flooring must carry an appropriate coefficient of friction rating for wet conditions. Polished or highly glazed surfaces that look continuous with interior floors can become hazardous when wet. Specify a finish with a slip-resistant texture for any surface exposed to rain, irrigation, or pool splash.
Drainage design directly affects safety. Surfaces that pool water create slip hazards and accelerate material deterioration. A graded exterior surface, combined with a linear drain at the threshold, keeps water moving away from the opening and off the walking surface.
Code note: threshold heights, slip-resistance ratings, and accessibility requirements differ by jurisdiction and project type. Confirm the applicable standards with your local building official or a licensed contractor before finalizing the design. This article provides general guidance, not code compliance advice.
What drives cost and how long does a typical project take?
Budget and schedule vary significantly based on project scope, site conditions, and local permitting. Understanding the cost drivers helps homeowners set realistic expectations and plan phases effectively.
Primary cost drivers:
- Structural header and beam work for wide openings (often the largest single line item in a retrofit)
- High-performance glazing systems, including slim-frame multi-slide or lift-and-slide doors
- Specialized threshold drainage and waterproofing assemblies
- One-plane finish leveling, which requires precision framing and sometimes subfloor modifications
- Site access and site drainage conditions
- Landscape integration, grading, and hardscape
- Permits, engineering fees, and design fees
Typical project phases and order of magnitude:
- Design and permitting: 6–14 weeks depending on municipal review times and project complexity
- Structural modifications: 1–3 weeks for header work and framing changes
- Waterproofing and drainage: 1–2 weeks, must be completed and tested before any finishes
- Glazing installation: 1–2 weeks, often on a lead-time-dependent schedule
- Interior and exterior finishes: 2–4 weeks
- Landscape and hardscape: 2–6 weeks, often the final phase
Pro Tip: Sequence waterproofing and drainage before any finish materials are delivered to the site. Protecting the membrane and drain assembly during subsequent trades is far easier than repairing finish damage caused by construction traffic. Ask your contractor for a written sequencing plan before work begins.
What mistakes do homeowners most often make, and how do you avoid them?
The most costly errors in indoor-outdoor projects are almost always the result of decisions made too late in the process, or not made at all.
Mismatched floor heights or finishes. When interior and exterior floors end up at different elevations, the threshold becomes a trip hazard and the visual connection is broken. The fix, after finishes are installed, typically means tearing out and re-leveling one surface. The prevention is a confirmed finish-height drawing signed off by all trades before framing begins.
Poor drainage at the threshold. A threshold without a designed drainage path will direct water toward the interior. This is the most common source of water damage in indoor-outdoor retrofits. Specifying a linear drain or a graded slab with positive drainage away from the opening is a non-negotiable part of the assembly.
Failing to coordinate sightlines. A large glass opening that looks directly at a fence, an HVAC unit, or an unplanted slope does not create a meaningful connection. Sightline planning, deciding what the opening frames before the opening is cut, is a design step that costs nothing and affects the result permanently.
Choosing doors or glazing not rated for local climate. A standard sliding door installed in a high-wind or high-humidity environment will fail prematurely. In storm-exposed regions, impact-rated glazing with corrosion-resistant hardware is the correct specification from the start.
Underestimating structural or waterproofing scope. Homeowners often budget for finishes and underestimate the structural and waterproofing work that makes those finishes possible. A large opening requires a properly engineered header. A flush threshold requires a continuous waterproofing membrane. Neither is optional.
The single highest-risk gap in retrofit projects: vague or unspecified waterproofing. If a contractor’s proposal does not name the waterproofing membrane product, the application method, and who is responsible for installing it, that scope is likely to be skipped or underperformed. Require a written waterproofing specification before signing any contract.
Pro Tip: In a retrofit project, the single review step that removes the most risk is a pre-construction finish-height survey. Have your contractor confirm the existing slab elevation, the proposed finish thickness for both interior and exterior surfaces, and the door sill height in writing before any demolition begins. Mismatches found at this stage cost an hour to resolve. Found after framing, they cost weeks.
What does research say about energy and wellbeing benefits?
The case for indoor-outdoor integration goes beyond aesthetics. A growing body of research connects biophilic design strategies, including the integration of indoor-outdoor connections, to measurable improvements in both building energy performance and occupant wellbeing.
A review published in Springer Nature found that biophilic design strategies are associated with reduced operational energy use and measurable improvements in stress and cognitive metrics for building occupants. The practical implication for homeowners is that design choices favoring natural light, ventilation, and visual connection to the outdoors are not just aesthetic preferences. They affect how a home performs and how its occupants feel day to day.
Natural ventilation through large, operable openings reduces mechanical cooling loads during mild weather. Daylighting that reaches deeper into interior rooms reduces artificial lighting demand. These are passive gains that compound over the life of the home.
| Benefit category | What the research indicates | Design strategy that delivers it |
|---|---|---|
| Energy performance | Biophilic strategies associated with reduced operational energy use | Natural ventilation, daylighting, shading |
| Occupant wellbeing | Measurable improvements in stress and cognitive metrics | Visual connection to nature, access to outdoor space |
| Thermal comfort | Passive strategies reduce mechanical system demand | Overhang depth, operable glazing, thermal breaks |
| Air quality | Increased ventilation improves indoor air quality | Operable openings, cross-ventilation design |
For homeowners weighing the investment, these benefits are most reliably captured when interior design trends and outdoor material choices are coordinated from the start, rather than selected independently.
A practical checklist and questions to bring to your contractor
Use this list at your initial contractor or designer meeting to surface hidden costs, confirm technical scope, and identify red flags before a contract is signed.
Pre-construction checklist:
- Confirm existing slab or subfloor elevation and document the proposed finished-floor height for both interior and exterior surfaces in writing.
- Confirm the drainage route for the threshold: where does water go, and who is responsible for installing the drain?
- Request the manufacturer name, model, and performance specifications for the door or glazing system.
- Ask for the waterproofing membrane product name, application method, and the trade responsible for installation.
- Request a hose test of the threshold assembly before any finish flooring is installed.
- Confirm which inspections are scheduled and at what stages (framing, waterproofing, final).
- Ask for a written finish-height drawing signed by all trades before demolition begins.
- Verify that a licensed structural engineer has reviewed and stamped the header or beam design for any opening wider than a standard door.
- Confirm the warranty terms for the waterproofing system and the glazing installation.
- Ask who holds the permit and who is the point of contact for the building inspector.
Red flags that suggest an under-specified plan:
- No named waterproofing product or application method in the proposal
- No structural engineer sign-off for openings wider than approximately 6 feet
- No drainage plan for the threshold or exterior deck
- Finish heights described as “to be determined” rather than confirmed in a drawing
- No sequencing plan that separates waterproofing from finish installation
Using 3D design previews before construction begins helps verify sightlines, finish alignments, and material continuity before any commitments are made.
If you’re planning a custom outdoor kitchen, pool, or integrated hardscape as part of your project, Uniquecompanies designs and builds these spaces with full in-house coordination across design, permitting, and construction. Explore custom outdoor kitchens and luxury hardscape designs to see how these elements come together in a finished project.
Key Takeaways
Seamless indoor-outdoor construction requires coordinated decisions across design, structure, waterproofing, and landscape, made early in the project before finishes are selected.
| Point | Details |
|---|---|
| Flush threshold is a structural decision | The one-plane sill requires coordinated framing, waterproofing, and drainage planned before construction begins. |
| Sightlines matter as much as openings | Aligning interior seating with a single outdoor focal point delivers strong perceived continuity at low cost. |
| Waterproofing must be specified in writing | Require a named product, application method, and responsible trade before signing any contract. |
| Climate drives glazing and shading specs | Door ratings, overhang depth, and SHGC values must match local conditions, not just aesthetic preferences. |
| Biophilic design has measurable benefits | Research links indoor-outdoor integration to reduced operational energy use and improved occupant wellbeing. |
Next step: schedule a site measure with a designer and confirm your existing slab elevation before any other planning decisions are made.
What experienced outdoor living contractors observe most often
The gap between a project that looks connected and one that actually feels connected almost always comes down to decisions made in the first two weeks of planning, not the last two weeks of construction.
After more than two decades of designing and building outdoor living environments, the pattern is consistent: homeowners who invest time early in threshold design, sightline planning, and waterproofing specification end up with spaces they use every day. Those who treat those decisions as details to be resolved later spend money correcting them after the fact.
The other observation worth stating plainly: the outdoor room concept works. Assigning a clear function to each exterior zone, dining, cooking, lounging, and aligning it with the adjacent interior function, transforms a patio from a surface into a place. That shift in how the space is planned changes how it is used. Uniquecompanies has seen this consistently across projects in Scottsdale, Chandler, Queen Creek, and the broader Phoenix area, where the climate makes outdoor living genuinely viable for most of the year when the design supports it.
The technical requirements are real and should not be minimized. But they are manageable when the right trades are coordinated from the start and the homeowner knows what questions to ask.
Useful sources and further reading
| Resource | Type | What it covers |
|---|---|---|
| Biophilic design and wellbeing review, Springer Nature | Peer-reviewed research | Energy performance and occupant wellbeing evidence for indoor-outdoor integration |
| One-plane sill method, Hearts at Home | Technical guide | Step-by-step flush sill assembly and waterproofing coordination |
| Threshold drainage strategies, ENV Design | Design guide | Flush transitions without step-downs; waterproofing options |
| Climate-specific design, SBC Florida | Case examples | High-wind and storm-exposure requirements for glazing and hardware |
| Indoor-outdoor flow design, Curated by Hower | Design guide | Sightline management and low-cost continuity strategies |
| Outdoor living services, Uniquecompanies | Service overview | In-house design, permitting, and construction coordination |
| 3D previews for outdoor spaces, Uniquecompanies | Tool guide | Visualization tools for verifying sightlines and materials before construction |
| Outdoor kitchen design, Uniquecompanies | Design guide | Specification and layout guidance for integrated outdoor kitchens |