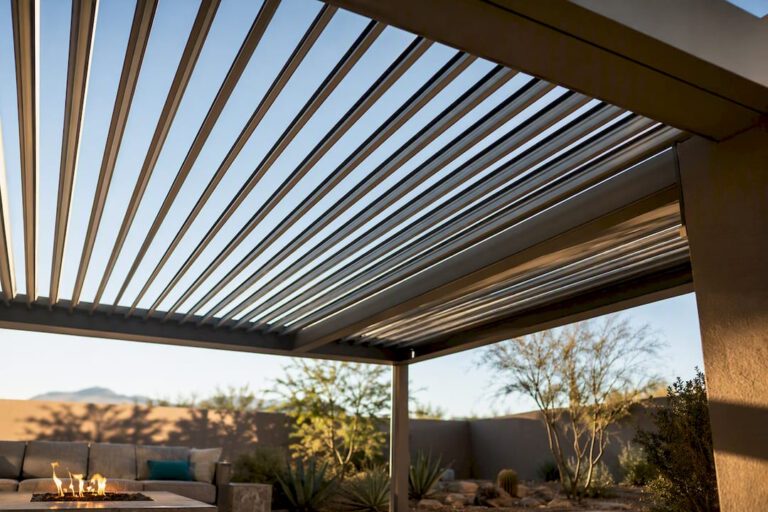
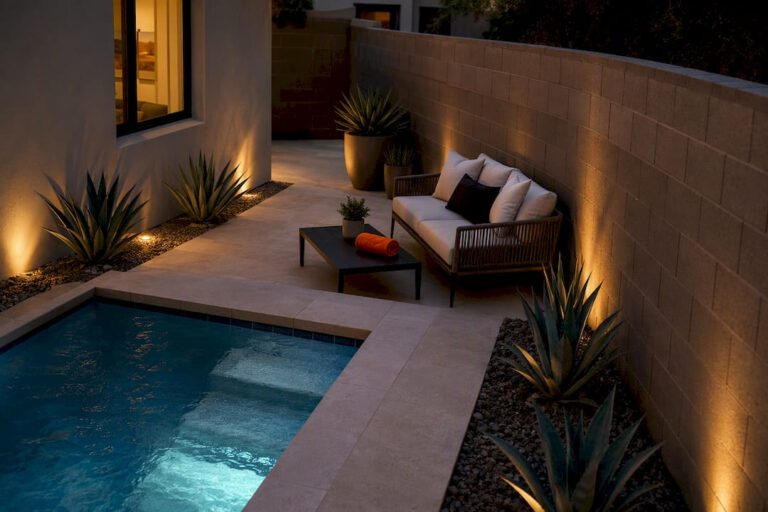
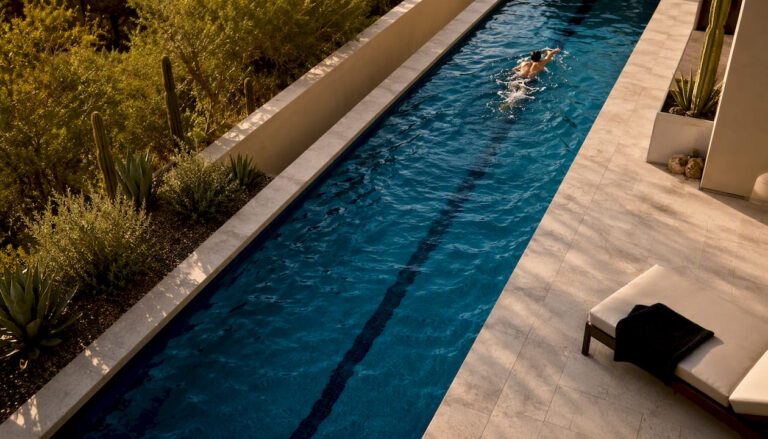
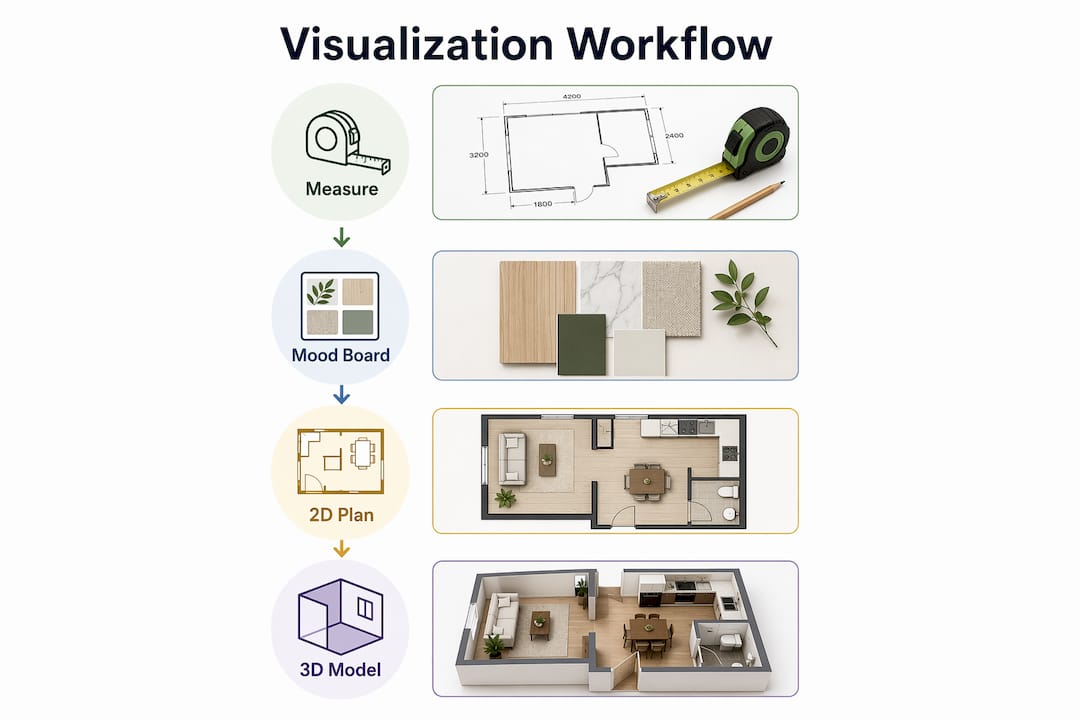
The fastest, repeatable way to visualize an outdoor space is a four-step workflow: measure the site → draw a 2D scaled plan → build a mood board → create a 3D model or AI mockup. Following that sequence in order keeps decisions grounded in real dimensions before any money is spent on materials or labor. The American Society of Landscape Architects (ASLA) consistently emphasizes that well-documented site plans reduce costly field changes, and Uniquecompanies applies the same principle on every project through in-house 3D previews before breaking ground.
A usable visualization must show:
- Accurate scale and measurements — every element drawn to a consistent scale so proportions are honest
- Materials and finishes — specific tile, paver, or decking selections, not generic placeholders
- Lighting at relevant times of day — midday sun, golden hour, and a dusk or night view
- Basic drainage and flow notes — slope direction, runoff paths, and any grade changes
- A contractor-ready summary — dimensions, utility locations, and a brief scope list
The Rule of Three, a foundational design principle, recommends grouping plants and hardscape elements in odd numbers to create a naturally balanced composition. Keep that principle in mind at every stage of the workflow.
Table of Contents
- How do you go from a blank yard to contractor-ready visuals?
- Which visualization tool fits your project and skill level?
- How to build a mood board for your outdoor project
- How to draw a 2D site plan that contractors can actually use
- How to build a basic 3D model and get a useful render
- What can AI photo mockups do, and where do they fall short?
- What should you have ready before meeting with a contractor?
- How to incorporate native plants and sustainable landscaping in your visuals
- Tips for visualizing patios, decks, water features, and lighting
- What are the most common visualization mistakes homeowners make?
- Key Takeaways
- Why the workflow matters more than the tool you choose
- Uniquecompanies brings your visualization to life in Phoenix
- Useful sources and further reading
How do you go from a blank yard to contractor-ready visuals?
A full visualization workflow starts with measured site capture and a 2D plan, then advances to 3D modeling and photorealistic renders so you can evaluate materials, lighting, and scale before construction begins. The steps below are ordered deliberately: each one feeds the next.
- Capture the site. Walk the property with a 100-foot tape measure and note lot lines, the building footprint, distances to property lines, existing trees and structures, grade changes, and utility locations (gas, water, electrical). Photograph every corner and elevation change.
- Draw a 2D scaled plan. Transfer your measurements to graph paper or a digital tool at 1/8" = 1’-0" for a typical yard. Mark setbacks, drainage arrows, hardscape zones, and circulation paths. This plan is the foundation for every tool you use next.
- Build a mood board. Collect reference photos, lock in a 3–5 color and material palette, and note specific plant selections. Fixing style decisions here prevents expensive pivots once you are inside a 3D tool.
- Create a 3D model or AI mockup. Import or redraw your 2D plan in a consumer 3D builder or AI photo tool, add materials and vegetation, then set sun angle and camera views. This is where scale and lighting become visceral rather than abstract.
- Know when to stop DIY work. If the project involves structural grading, a pool, engineered drainage, or local permitting in Phoenix, hand the measured plan and mood board to a design-build team. Visualization tools do not replace licensed engineering or permit drawings.
Pro Tip: Before running any AI mockup, photograph the site from a slight elevation rather than standing at ground level. Ground-level shots often hide grade changes, and the AI will flatten them in the render, producing a result that looks nothing like your actual yard.
3D visualization matters more than most homeowners expect. Landscape firms commonly offer three visualization levels — sketches, measured 2D plans, and high-definition 3D models — because each level resolves a different category of decision. Sketches confirm intent; measured plans confirm fit; HD 3D models confirm materials and lighting.
Which visualization tool fits your project and skill level?
The table below compares four tool categories across the dimensions that matter most for homeowners planning outdoor spaces.
| Category | Best for | Ease of use | Output type | Platform | Cost | Libraries | Share/Export |
|---|---|---|---|---|---|---|---|
| Web whiteboards / mood boards | Concept collages, material palettes | Very easy | 2D collage, image | Web | Free tier available | Photo uploads, templates | Image, PDF |
| AI photo mockups | Fast concept images from site photos | Easy | Photorealistic image | Web | Free tier; paid for HD | Prompt-driven | Image download |
| Consumer 3D builders | Site plans, basic 3D scenes | Moderate | 2D plan + 3D view | Web, iOS/Android | Free tier; CAD/PDF export gated behind paid plan | Plant and furniture libraries | Image, PDF (paid) |
| Pro 3D modeling apps | Precise modeling, construction-level detail | Steeper learning curve | Full 3D, CAD-ready | Desktop, web | Free tier limited; paid for export | Extensive material and plant libraries | CAD, PDF, image, 360° |
Specific tool recommendations:
- Canva — the right choice for mood boards and concept collages. Its whiteboard templates let you drag in reference photos, material swatches, and color palettes without any design training. Export as PDF to share with a contractor.
- RoomSketcher — well suited for drawing a 2D site plan and generating a quick 3D view. The free tier covers basic layouts; high-resolution 3D renders and PDF exports require a paid plan.
- Planner 5D — a solid consumer 3D builder for homeowners who want a furnished, textured outdoor scene without a steep learning curve. Free for basic use; HD renders are behind a paywall.
- SketchUp Free — the most precise option in this list for homeowners comfortable with a slightly longer learning curve. The web-based free tier supports accurate 3D modeling; CAD and high-resolution exports require a paid subscription.
- iScape — mobile-first and purpose-built for outdoor design. Strong plant library with AR preview on iOS; best for quick planting layouts and on-site experimentation rather than contractor-ready documentation.
Free tiers across all these tools are genuinely useful for concept work. The limitation is consistent: export options and CAD-ready files are typically gated behind paid plans, so budget for an upgrade if you need print-ready or contractor-shareable outputs.
How to build a mood board for your outdoor project
A mood board locks in your style, materials, and plant palette before you open any 3D tool. Changing a material in a mood board takes seconds; changing it after you have textured a 3D model takes considerably longer.
- Collect 10–15 reference photos. Pull from project galleries, Pinterest, and manufacturer websites. Focus on spaces that match your climate and lot size, not just aesthetics.
- Select 3–5 color and material anchors. Apply the Rule of Three here: choose a primary hardscape material, a secondary accent material, and one plant color that ties the palette together.
- Add textures and furniture. Include photos of the actual pavers, decking, or tile you are considering, plus scaled furniture pieces that reflect real footprints.
- Include plant selections and a lighting mood. Add photos of specific plants (not just generic “shrubs”) and at least one dusk or evening image to communicate the lighting atmosphere you want.
- Export and share. In Canva, export the finished board as a PDF. Label each material with its product name and dimensions so a contractor can source it directly.
Pro Tip: Photograph a 12×12 tile or paver sample next to a common reference object — a standard brick or a dollar bill — before adding it to the mood board. That single photo communicates material scale far more clearly than a product name alone.
To convert the mood board into 3D parameters, note the exact material names, tile sizes, and furniture footprints from your board. Those become the inputs for textures and object dimensions in RoomSketcher, Planner 5D, or SketchUp Free.
How to draw a 2D site plan that contractors can actually use
A 2D scaled plan is the single document that ties every other visualization together. Without accurate measurements, a 3D model is decorative fiction.
Measurements to take before you draw anything:
- Lot lines and total property dimensions
- Building footprint with distances to all property lines
- Location and trunk diameter of existing trees
- Existing structures (sheds, fences, retaining walls)
- Slope changes — measure the elevation drop across the yard in at least four points
- Utility locations: gas meter, electrical panel, irrigation valves, hose bibs, and any buried lines
Drawing the plan:
Use 1/8" = 1’-0" as your working scale for a typical residential yard. On graph paper, each square represents one foot at that scale. Digitally, RoomSketcher and SketchUp Free both support custom scale input. Mark circulation paths with dashed lines, drainage arrows pointing downslope, hardscape areas with a light fill, and plant zones with a simple hatch.
Pro Tip: After drawing the rectangle of your house footprint, measure the diagonal from one corner to the opposite corner and compare it to the calculated diagonal from your measurements. If the numbers match, your plan is square. If they do not, recheck your wall measurements before building anything on top of that plan.
| Plan element | What to mark | Why it matters |
|---|---|---|
| Property lines | Exact dimensions and setback distances | Determines buildable area and permit compliance |
| Utilities | Gas, water, electrical, irrigation | Prevents costly conflicts during construction |
| Grade changes | Elevation drop across yard | Drives drainage design and grading costs |
| Circulation paths | Primary and secondary foot traffic routes | Informs hardscape layout and safety |
| Existing vegetation | Trees, shrubs with canopy radius | Affects shade, root zones, and removal costs |
How to build a basic 3D model and get a useful render
A single, well-composed 3D view from a key vantage point delivers more decision-making value than a dozen low-quality renders. Focus on quality over quantity.
- Import or redraw the 2D plan. In RoomSketcher or SketchUp Free, trace your scaled plan as the floor layer. Set the terrain to reflect any grade changes you measured.
- Add hardscape and structures. Place patios, decking, pergolas, and walls at their correct dimensions. Use the actual material finish you selected in the mood board.
- Place plant masses and furniture. Use plant mass objects or scatter tools rather than individually detailed plants. This keeps file sizes manageable and renders faster. Apply the Rule of Three to groupings.
- Apply materials. Match texture names to your mood board selections. For realistic outdoor renders, use HDRI sky maps when available — they project accurate light and shadow across every surface.
- Set sun angle and time of day. Run at least two views: midday and late afternoon (golden hour). Add a dusk view if lighting design is part of the project.
- Select camera positions and export. Render at mid-quality first for quick review, then at high resolution for final sharing.
Camera view checklist:
- Kitchen or living room window looking out to the yard
- Seating area close-up at eye level
- Overall aerial view showing the full layout
Pro Tip: For lighting-heavy projects like outdoor lighting design, render a dusk or night view with your planned fixture positions marked. Lighting decisions made from a daytime render alone often produce disappointing results after installation.
Free tiers in consumer tools support this workflow for concept purposes. High-resolution exports and 360° walkthrough outputs typically require a paid upgrade — factor that into your planning budget if you need contractor-shareable files.
What can AI photo mockups do, and where do they fall short?
AI landscape rendering tools can turn a site photograph into a photorealistic concept image in under a minute, without requiring any 3D modeling knowledge. For early concepting and client mood exploration, that speed is genuinely useful. Some services let homeowners upload a photo and receive multiple design variations in under 30 seconds.
The limitation is structural. AI tools produce plausible images, not spatially accurate models. They do not account for grade changes, soil conditions, drainage engineering, or local permitting requirements. A render that looks buildable may describe a layout that is physically impossible on the actual site.
The practical framework is straightforward: use AI rendering for concept stage, rapid iteration, and early client-facing presentations. Use measured 3D software for planning submissions, technical coordination, and any project where spatial accuracy is a requirement. Many design professionals now use both in sequence — AI rendering to confirm direction, followed by 3D modeling for technical development.
Where AI mockups work well:
- Early concepting before committing to a design direction
- Generating seasonal or time-of-day variations quickly
- Sharing inspiration images with friends, family, or a contractor
Where to avoid relying on AI alone:
- Permit submissions or HOA approval packages
- Projects involving pools, structural grading, or engineered drainage
- Any scope where the contractor needs buildable dimensions
⚠️ Caution: For any project involving a pool, retaining wall, or significant grade change, a photorealistic AI image is not a substitute for a measured site plan and professional engineering review.
Pro Tip: Feed the AI the highest-resolution photo your camera produces, not a compressed social media export. Pixel density is how the model reads spatial depth — a compressed image gives it less to work with and produces flatter, less accurate results.
What should you have ready before meeting with a contractor?
Arriving at a contractor meeting with organized visuals and measurements cuts estimate time and reduces the risk of scope misunderstandings later. The most critical factor in a successful landscape project is thorough upfront documentation.
Contractor-ready package checklist:
- Scaled 2D plan with all measurements labeled
- Site photos from at least four fixed viewpoints (corners and the primary viewing angle from inside the house)
- Mood board with material names, product numbers, and approximate unit costs
- Utility and drainage notes (locations, known conflicts, slope direction)
- Desired timeline with any hard deadlines (seasonal, HOA, permit windows)
- Budget range, stated as a realistic band rather than a single number
Realistic lead times for Phoenix projects:
Design and permitting in the Phoenix metro typically runs 4–8 weeks depending on project complexity and municipal review queues. Construction scheduling for pools and major hardscape often books 8–16 weeks out from permit approval, with summer heat affecting pour and installation windows. Plan accordingly if you have a target completion date.
Pro Tip: When you first meet with a contractor, ask for a sample scope-of-work outline and a list of the specific details they need to generate an accurate estimate. That question alone tells you whether the contractor is organized and whether your documentation package is complete.
How to incorporate native plants and sustainable landscaping in your visuals
Visualizing native and drought-tolerant plants accurately requires more specificity than most homeowners apply. Dropping a generic “shrub” object into a 3D model tells you nothing about water demand, mature size, or seasonal appearance.
In Arizona, species like desert willow (Chilopsis linearis), red bird of paradise (Caesalpinia pulcherrima), and blue palo verde (Parkinsonia florida) have distinct canopy shapes and bloom cycles that affect both aesthetics and shade modeling. When building your 3D model, use plant objects that approximate the mature canopy spread of your actual selections, not a default sphere.

For eco-friendly landscaping and water-wise design, mark irrigation zones on your 2D plan with separate hatch patterns for high-water and low-water areas. That distinction matters when a contractor is sizing a drip system or calculating water budgets. Grouping plants by water need in the visualization also makes the irrigation layout more logical and less expensive to install.
Apply drift planting for large beds. For plantings beyond roughly ten plants, designers shift from small clusters to drift planting to avoid repetitive patterns and achieve a naturalized composition. In a 3D model, scatter tools handle this well; in a 2D plan, draw irregular drifts rather than evenly spaced rows.
Tips for visualizing patios, decks, water features, and lighting
Each outdoor feature type has specific visualization considerations that generic tutorials tend to skip.
Patios and hardscape: Model the paver or tile pattern at actual scale, not as a solid fill. A 24×24 porcelain tile looks dramatically different from a 12×24 brick-pattern layout at the same square footage. For luxury patio features, include edge details and transition materials in the model — those transitions are where budget surprises often originate.
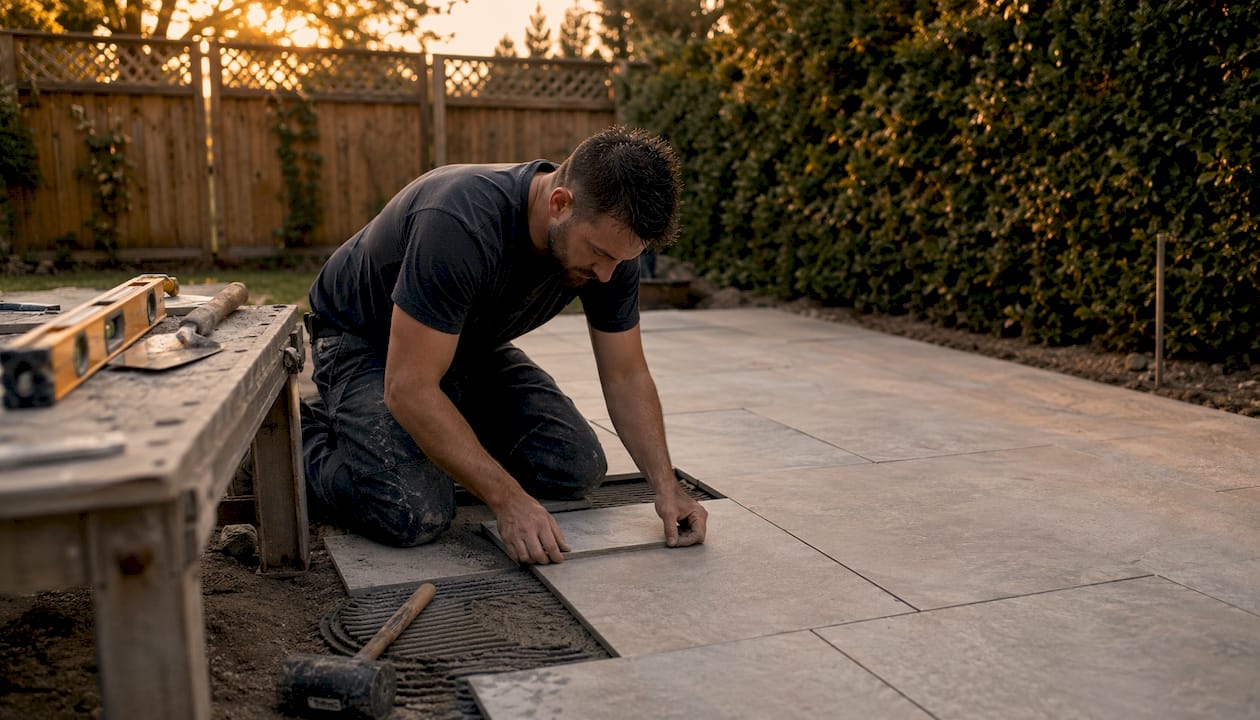
Decks: Show the deck at its finished height relative to the house threshold and the yard grade. A deck that sits 18 inches above grade requires steps and possibly a railing, both of which affect the visual and the budget. Mark those elements explicitly in both the 2D plan and the 3D view.
Water features and pools: Static water in a render looks artificial. If your tool supports it, apply a subtle ripple or caustic effect to pool surfaces. More practically, show the pool coping material and the water color together — plaster color, tile, and coping interact significantly under direct Arizona sun. For custom pool features, a dedicated pool design tool like the Genesis Pool Designer provides more accurate water and finish previews than a general-purpose 3D builder.
Lighting: Never evaluate a lighting design from a daytime render alone. Render a dusk or night view with fixture positions marked. Path lights, uplights on trees, and professional landscape lighting all behave differently at night than their daytime positions suggest. The After Sundown project gallery shows how dramatically lighting transforms a space after dark.
What are the most common visualization mistakes homeowners make?
Most visualization errors fall into a small number of repeatable patterns. Recognizing them early saves time and prevents decisions that look right on screen but fail in the field.
Drawing without measuring first. Sketching a layout from memory or rough estimates produces a plan that cannot be trusted. A patio that “looks like it fits” in a freehand sketch may be two feet short of the property setback. Measure before you model, every time.
Ignoring grade changes. Flat-ground assumptions are the most common source of budget surprises in outdoor construction. A yard that drops six inches across 20 feet requires grading, drainage, and possibly a retaining wall. None of that shows up in a flat 3D model unless you input the elevation data.
Over-rendering, under-planning. Spending hours perfecting a photorealistic render before locking in measurements and materials is a common trap. The render looks convincing, but the underlying plan has no real dimensions. Contractors cannot build from a beautiful image.
Treating AI mockups as buildable plans. AI-generated images are concept tools. They do not contain spatial data, engineering, or permit-ready documentation. Using one as the primary deliverable to a contractor creates scope confusion and change orders.
Skipping the night view. Lighting is one of the highest-impact elements in an outdoor space, and it is almost always evaluated last. Add a dusk render to every project, even a simple one.
Violating the Rule of Three without a reason. Even-numbered plant groupings and symmetrical layouts can feel rigid in informal outdoor settings. Grouping in odd numbers creates natural visual movement. Depart from that principle deliberately, not by accident.
Key Takeaways
A well-executed visualization workflow — measure, plan, mood board, 3D model — reduces change orders and keeps contractor conversations grounded in real dimensions from the first meeting.
| Point | Details |
|---|---|
| Measure before modeling | Accurate site measurements are the foundation; skipping them makes every subsequent visual unreliable. |
| Mood board locks decisions | Fix your material palette and plant selections in a mood board before opening any 3D tool to avoid costly pivots. |
| AI mockups are concept tools | AI renders are fast and useful for early ideation but do not replace measured plans or engineering for buildable projects. |
| One strong 3D view beats many weak ones | A single well-composed render from a key vantage point delivers more decision value than multiple low-quality exports. |
| Uniquecompanies for complex projects | When pools, grading, permitting, or integrated outdoor kitchens are involved, Uniquecompanies provides in-house 3D previews, engineering, and full design-build execution in the Phoenix metro. |
Why the workflow matters more than the tool you choose
The most common mistake homeowners make when planning an outdoor space is treating visualization as a final step rather than a decision-making process. A beautiful render produced after all the material and layout decisions have already been made is documentation, not design. The value of visualization is in the questions it forces you to answer early: Does the patio feel proportional to the house? Does the pool placement block the afternoon shade from that tree? Does the lighting plan actually work at 8 PM in December?
With 24 years building luxury outdoor living environments in the Phoenix area, Uniquecompanies has seen the difference between projects that started with a thorough measured plan and 3D preview and those that did not. The projects with strong upfront visualization consistently produce fewer change orders, more accurate bids, and faster construction timelines. The 3D preview is not a sales tool — it is a coordination tool that aligns the homeowner, the designer, and the construction crew before the first shovel moves.
For DIY homeowners, the four-step workflow in this guide is sufficient for most concept and planning work. The point at which to bring in a professional is clear: when the project involves a pool, significant grading, engineered drainage, or local permitting, the visualization needs to be backed by licensed engineering and a contractor who knows the municipal process. That is not a limitation of the tools — it is the nature of the work.
Uniquecompanies brings your visualization to life in Phoenix
DIY tools like Canva, RoomSketcher, and SketchUp Free are genuinely useful for concept work. But when your visualization reveals a project that involves a custom pool, an outdoor kitchen, integrated lighting, or complex hardscape, the next step is a design-build team that can take your measured plan and mood board and turn them into a permitted, constructed reality.
Uniquecompanies handles the full scope in-house: detailed site survey, engineering, permitting, 3D visualization, project management, and construction, all coordinated by a single team with deep knowledge of Phoenix-area permitting and Arizona’s climate demands. That means your mood board and 2D plan become the starting point for a professional design process, not a document you hand to three separate contractors and hope they interpret consistently.
If you are ready to move from concept to construction, start your custom design with Uniquecompanies and see how in-house 3D visualization reduces surprises from the first conversation.
Useful sources and further reading
For DIY learning and tool tutorials:
- How to Visualize Outdoor Designs in 3D: Complete Guide — Structure Studios: detailed workflow from site capture to photorealistic render
- AI Landscape Design Rendering Guide — ArchFine: practical guidance on AI photo mockup inputs, prompts, and limitations
- The Rule of 3 in Landscaping — Randy Lemmon: accessible explanation of the design principle with yard-size guidance
- Planting in Threes Explained — Horticulture Magazine: when to apply and when to break the odd-number rule
- Best Practices for Realistic Outdoor Visualizations — Arktek 3D: technical guide to HDRI lighting, scatter vegetation, and texture realism
For hiring a design-build professional in Phoenix:
- How 3D Visualization Transforms Luxury Outdoor Construction in Phoenix — Uniquecompanies: how professional 3D previews reduce change orders and timeline risk
- Designing Your Unique Backyard — Uniquecompanies: overview of the full design-build process and what homeowners should expect
- Phoenix Hardscape Design and Installation — Uniquecompanies: materials, scope, and contractor-ready documentation for hardscape projects