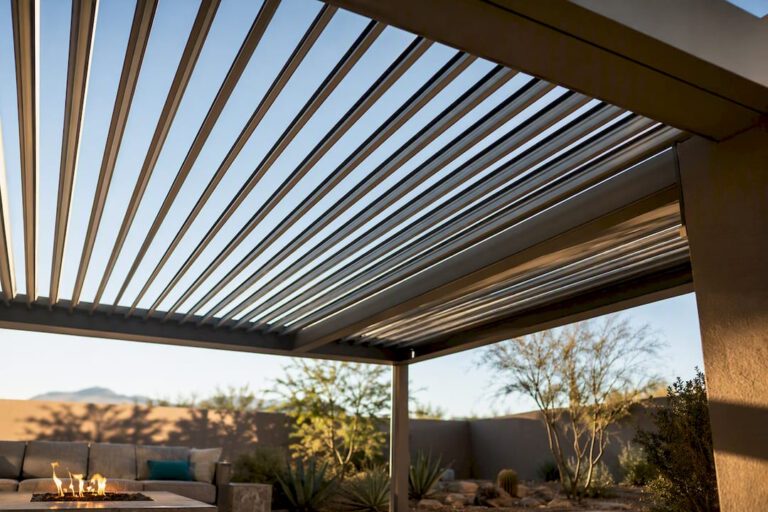
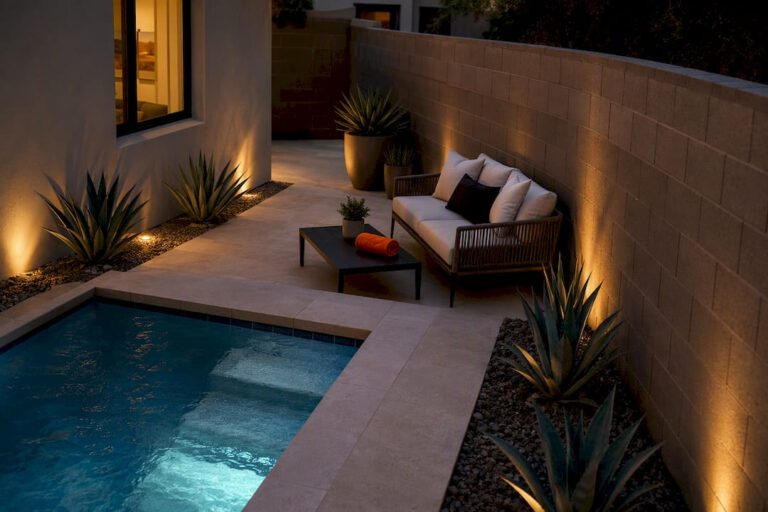
A spa spillway is the raised edge where a spa overflows into the pool below, and the strongest default for most backyards is a raised square spa with a wide sheet spill finished in glass tile. Choose that combination and you get quiet, even flow and a contemporary look that suits most Arizona landscapes. The bigger decision comes next: whether the spa shares water and heating with the pool, or runs on its own dedicated system.
TL;DR:
- Using a sheet spillway creates the quietest water flow and is ideal for calm, contemporary spa overflows in Arizona landscapes.
- Material selection for the spillway face, such as glass tile or natural stone, significantly impacts maintenance, appearance, and long-term durability.
- The size and shape of the spa, especially spill width and height, influence both aesthetics and noise levels, with wider edges producing quieter flows.
- Retrofit projects require structural reinforcement and precise plumbing planning, with shared loops being more cost-effective but less independent than isolated systems.
- Prioritize plumbing and structural assessments over aesthetic details to ensure proper function and avoid costly, time-consuming corrections later.
Table of Contents
- Spa Spillway Ideas: Matching Style to Sound and Setting
- How Do Materials Change the Look and Upkeep of a Spillway?
- What Spa Shape and Size Work Best for Your Pool?
- Retrofit vs. New Build: What Changes When You’re Adding a Spa Later
- Lighting and Fire Pairings That Make a Spillway Glow at Night
- What Does a Spillover Spa Actually Cost, and How Long Does It Take?
- What Builders Wish Homeowners Knew Before Retrofitting a Spillway
- Detailed Plumbing Requirements and Modifications by Spillway Type
- How Do You Waterproof a Spillway to Prevent Leaks?
- What Maintenance Does a Spa Spillway Actually Require?
- Are Spa Spillways Safe for Kids and Guests?
- How to Brief a Builder on a Custom Spillway Design
- Where the Real Decision Point Actually Sits
- Ready to Build a Custom Spillway? Here’s the Low-Risk Path
- Sources
Spa Spillway Ideas: Matching Style to Sound and Setting
The style you pick determines both how the water looks and how loud your backyard becomes. Three basic approaches cover most projects, and each behaves differently once water starts moving.
A sheet spillway sends a wide, even film of water over the edge. It’s the quietest option and the one most homeowners gravitate toward for a spillover spa that reads as calm rather than dramatic. A sheer-descent spillway narrows the flow into a clean, glassy curtain, which catches light beautifully and works well when you want backlighting to be the star. Scuppers are individual spouts, usually cast bronze or copper, that deliver a more audible, splashing waterfall effect. They’re louder by design, which some homeowners want and others actively avoid near a bedroom window.
Within those three families, a handful of variations show up again and again in well-photographed backyards:
- Wide sheet spill across the entire spa face for a resort-style, low-noise pour
- Narrow channel spill concentrated in the center for a more sculptural, focal-point look
- Multiple scuppers spaced along the spa wall for layered sound and visual rhythm
- Glass tile spill band where the entire face is clad in iridescent mosaic
- Infinity illusion spill where the spa edge appears to disappear into the pool’s horizon line
- Stepped weir spill with two or three tiers that slow the water and add texture
Sound and lighting behavior track closely with flow rate. A thin sheet over a wide edge produces a soft hush; a scupper produces a distinct trickle-to-splash sound depending on drop height. Both photograph differently at night, too. Sheet spills backlit with LED glow evenly, while scuppers create individual points of sparkle. If you’re planning custom water features, this is the point where style choice starts to intersect with plumbing design.
How Do Materials Change the Look and Upkeep of a Spillway?
Material choice affects the spillway more than any other single decision, both in daily appearance and in how much maintenance it demands.
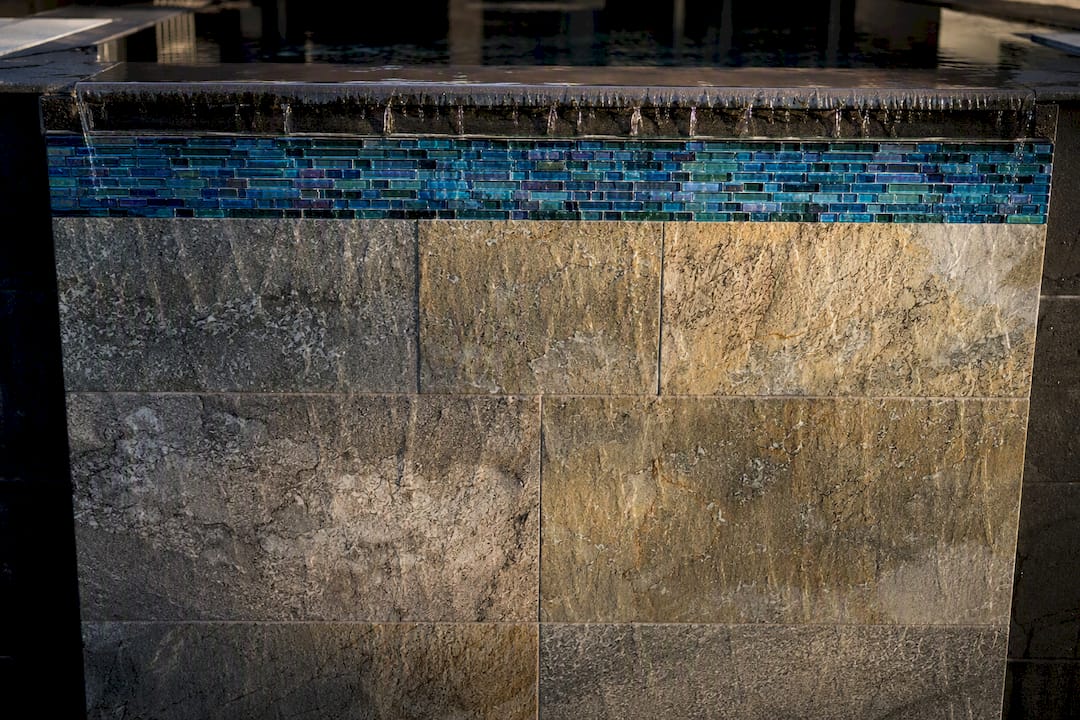
Glass mosaic tile produces the shimmering, contemporary sheet effect that dominates current spillover spa design. It reflects light dramatically when wet and holds color well over time, though grout lines need periodic resealing to resist staining. Porcelain or ceramic tile is a budget-friendlier alternative with a similar clean look, but it can show wear at the waterline faster than glass. Travertine and flagstone create an organic, lagoon-style aesthetic, ideal if your backyard leans natural rather than modern, though porous stone requires sealing to prevent staining and calcium buildup. Honed granite offers a smooth, matte face that hides water spots better than polished stone and holds up well against Arizona sun exposure.
Grout and sealant condition matters more on a spillway than almost anywhere else in the pool, since the face gets constant water contact and mineral exposure.
- Glass tile: highest visual impact, moderate maintenance, resists fading
- Porcelain/ceramic: lower cost, moderate durability at the waterline
- Travertine/flagstone: natural texture, needs regular sealing
- Honed granite: durable and matte, higher material cost
Pro Tip: If your budget only stretches to upgrade one surface, put it into the spillway face tile rather than the interior spa shell. The face is what everyone sees and photographs; the shell finish disappears once the water’s moving.
A contrasting “jewelry band” (a narrow strip of glass tile against a stone body) is a small upgrade that reads as custom-designed rather than off-the-shelf.
What Spa Shape and Size Work Best for Your Pool?
Shape drives both function and feel. Round spas suit softer, organic pool lines and tend to pair naturally with sheer-descent spills. Square and rectangular spas photograph cleaner against modern hardscape and are the easiest shape to fit a wide sheet spillway across. L-shaped or geometric footprints work when the spa needs to wrap a corner or share a wall with a raised seating area.
Width and height do the real work of controlling sound and appearance:
- Wider spill edges spread the same water volume thinner, producing a quieter, glassier sheet
- Narrower edges concentrate flow, increasing both sound and splash
- A raise height of about a foot or so above the pool’s waterline is typical for a visible, photogenic pour without excessive splash-back
- Taller raises (24 inches or more) increase drama and sound but demand more structural support
Corner placement tends to maximize deck space and sightlines from the house, while a spa attached along one full side reads more like a single unified water feature. Either way, think about seating and sightlines before you commit to a footprint. This is the last easy change before excavation starts.
Retrofit vs. New Build: What Changes When You’re Adding a Spa Later
Adding a spillway spa to an existing pool is a different project than building one into new construction, and the gap is almost entirely structural. Retrofits frequently require tying into the pool’s existing bond beam, reinforcing the shell where the new spa wall meets it, and removing a section of deck to get there. A structural engineer should review shell condition before demolition begins on any pool built more than a few years ago.
- Structural work first. Bond beam tie-ins and shell reinforcement determine whether the retrofit is straightforward or a major undertaking, and they typically set the schedule for everything downstream.
- Choose your plumbing loop. A shared water loop uses the pool’s existing filtration and heater, which is more cost-effective since it avoids duplicate equipment. An isolated spa loop with its own valving lets you hold spa temperature independently, but adds upfront cost.
- Size the equipment correctly. Filtration and heater capacity need to account for the added spa volume, and undersized equipment is one of the most common retrofit mistakes.
- Sequence the phases. Structural work extends the timeline more than any other phase, since deck removal and reinforcement must cure and pass inspection before plumbing and finishes begin.
The shared-loop approach keeps costs down because you’re not duplicating pumps and filters, but it also means the whole pool heats up whenever you run the spa. That’s the trade-off worth deciding early, not mid-project.
Lighting and Fire Pairings That Make a Spillway Glow at Night
Subtle LED placement behind or beneath the spillway edge turns a daytime feature into a glowing focal point after dark. Undercut lighting works especially well with sheer-descent spills, since the curtain effect scatters light evenly.
- LED strips set into the spillway lip for even backlighting
- Fire bowls flanking the spa for a fire-and-water contrast, provided code-required clearances are met
- Linear fire features integrated into a raised wall behind the spa
- A tanning ledge or built-in bench adjacent to the spa to tie the feature into a usable living space
Pro Tip: Fire pairings look spectacular in photos, but get your clearances confirmed by your contractor before you fall in love with a specific layout. Local code requirements on fire-to-water spacing vary and can force a redesign late in the process.
What Does a Spillover Spa Actually Cost, and How Long Does It Take?
Budgets vary widely by scope, but retrofit projects commonly start in the mid $6,000 range and climb from there depending on tile selection, structural reinforcement, and whether you add a separate heater.
- Premium glass tile and stone finishes push costs up fastest
- A dedicated heater and isolated plumbing loop add meaningfully to the budget
- Structural reinforcement (bond beam work, shell tie-ins) is the single biggest cost driver on retrofits
A typical schedule runs through site assessment, demolition, structural work, plumbing, finishes, and commissioning, usually spanning several weeks to a few months depending on permit turnaround. Permit review and inspection windows vary by jurisdiction, so build that buffer into your expectations before requesting bids.
What Builders Wish Homeowners Knew Before Retrofitting a Spillway
After 24-plus years building custom outdoor living spaces across the Phoenix area, Uniquecompanies sees the same short list of decisions separate a smooth spillway project from a frustrating one.
- Confirm raise height and spill width on paper (or in a 3D preview) before construction starts
- Pick your tile before demo begins; sourcing delays are a common cause of schedule slips
- Install a dedicated makeup line and isolation valving if you want independent spa temperature control
- Get a structural assessment before assuming a retrofit is straightforward
The most frequent homeowner mistake is underestimating how much deck and shell work a retrofit actually touches, then being surprised by the timeline. A good design-build contract should spell out phases, equipment specifications, and finish selections in writing before a shovel goes in the ground.
Pro Tip: Ask to see a 3D rendering of your spillway before committing to tile. Glass mosaic reads very differently on a screen than it does under Arizona sun with water moving over it, and a preview catches mismatches early.
Detailed Plumbing Requirements and Modifications by Spillway Type
Plumbing scope changes depending on which spillway style you choose. Sheet and sheer-descent spills both rely on an evenly distributed manifold running the width of the spa wall, which requires precise leveling during construction, since even a slight tilt creates an uneven pour that’s obvious the moment water starts flowing. Scupper systems are simpler in some ways, using individual supply lines to each spout, but they demand more return-line planning if you’re running four or more scuppers off a shared pump.
The bigger plumbing decision is loop configuration. A shared loop ties the spa’s spillway return directly into the pool’s circulation system, using the same pump, filter, and heater. This keeps installation simpler and cost lower, but it means running the spillway effectively circulates and slightly cools spa water into the main pool. An isolated loop uses separate plumbing runs and a dedicated valve actuator, letting an automation system switch between “spa mode” and “spillway mode” without mixing temperatures.

A makeup line with a manually adjustable ball valve at the equipment pad is a practical detail worth requesting specifically. It keeps a small amount of water moving through the pool even while the spa runs in isolated mode, which prevents stagnant zones and keeps chemistry balanced across both bodies of water. Automation controllers should include a spa-isolation valve whenever independent heating is part of the plan, since retrofitting that valve later means reopening finished plumbing runs.
How Do You Waterproof a Spillway to Prevent Leaks?
Waterproofing matters more on a spillway than almost any other pool feature because the water flows continuously over a vertical, often elevated surface, exposing every seam and joint to constant pressure.
The structural shell itself needs a continuous waterproof membrane before tile goes on, particularly at the bond beam tie-in point where a new spa wall meets the original pool structure. This joint is the single most common leak point on a retrofit, since it’s where two separate pours of concrete or gunite meet. A cementitious waterproofing coating or a fabric-reinforced membrane, applied before tile setting, bridges that seam and absorbs minor structural movement without cracking.
Grout and tile sealant on the spillway face need to be genuinely waterproof, not just water-resistant, since the surface never fully dries. Epoxy grout holds up better than standard cement grout in this application, resisting the constant saturation that leads to eventual crumbling and hairline leak paths. Natural stone finishes like travertine need a penetrating sealant reapplied every year or two, since porous stone left unsealed will absorb water and eventually spall or crack from freeze-thaw cycling in cooler climates.
Pressure testing the plumbing lines before the deck goes back down is a step worth confirming explicitly with your contractor. Once decking and tile are finished, a slow leak in a spillway supply line can go undetected for months, showing up only as unexplained water loss or soft spots in the surrounding hardscape.
What Maintenance Does a Spa Spillway Actually Require?
Spillways create more surface area exposed to sun, debris, and mineral deposits than a standard pool wall, and that translates into a specific maintenance routine.
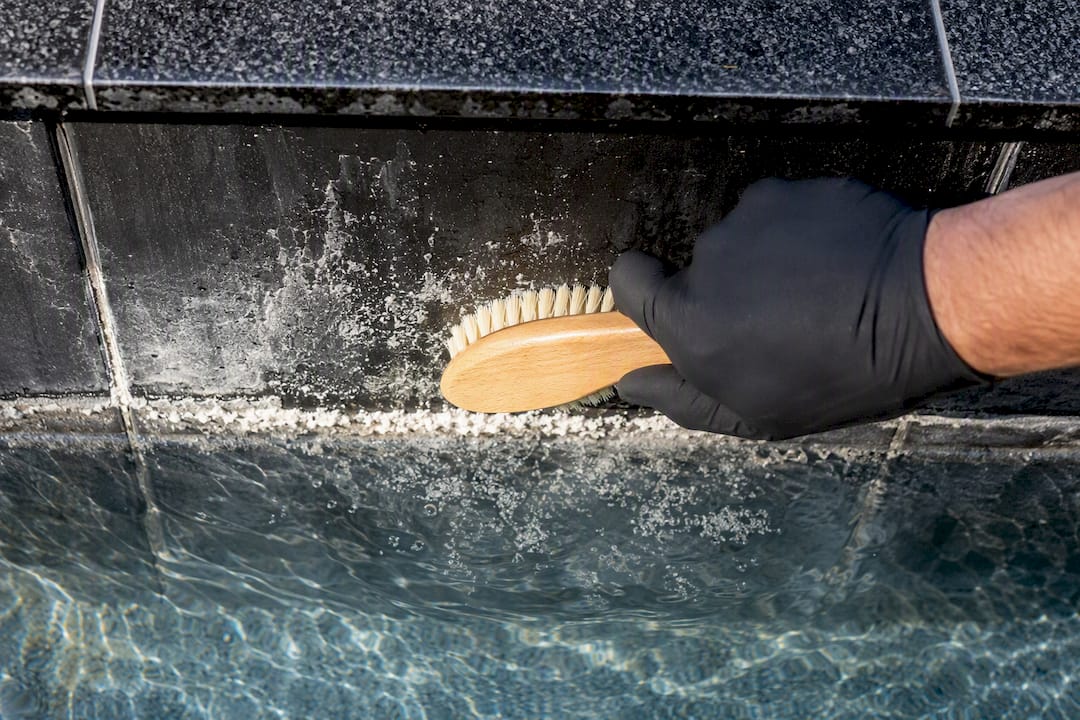
Calcium scaling is the most visible issue, especially on darker tile or natural stone, where white mineral deposits build up wherever water evaporates off the spillway face. Regular brushing with a soft-bristle brush and a scale-specific cleaner keeps this from becoming a permanent stain. Glass tile resists staining better than stone, which is one practical reason it’s become the default finish for high-visibility spillway faces.
Debris buildup happens at the low point where the spillway meets the pool, since leaves and windblown material collect right where the water pours in. A skimmer positioned near the spillway catch basin, checked weekly, prevents that debris from cycling through the pump and clogging the spillway manifold’s smaller ports.
Grout lines need annual inspection regardless of tile type, since the constant water flow accelerates the erosion that eventually leads to loose tile. Catching a failing grout line early is a small repair; ignoring it usually means resetting an entire section of tile once water gets behind it.
If your spillway runs on a separate loop with its own heater, that heater needs the same seasonal service as your main pool equipment, including descaling and filter checks, since it’s easy to forget equipment that isn’t part of your everyday pool routine.
Are Spa Spillways Safe for Kids and Guests?
Spillway edges introduce two safety considerations that don’t exist on a flat pool wall: slip risk and an elevated fall height.
The raised spa wall itself becomes a walking surface for some guests, whether intentionally or not, and a wet, tiled edge is inherently more slippery than a textured deck. Choosing a honed or matte finish rather than a polished glass tile on any horizontal walking surface near the spillway reduces that risk meaningfully, even though the vertical spill face itself can stay glossy for visual effect.
Raise height, discussed earlier as a design and sound decision, is also a safety one. A drop of 18 to 24 inches from spa deck to pool water is manageable for adults but worth flagging if young children will have unsupervised access to the area. Some homeowners add a low decorative rail or dense planting along the open side of a raised spa specifically to discourage climbing.
Standard pool barrier and fencing requirements apply to the spa the same way they apply to the pool, and a spillway doesn’t change your obligations there. What it does change is sightlines: a raised spa wall can block a clear view of the water from certain angles in the yard, so consider that when placing seating or planning where an adult would supervise from.
How to Brief a Builder on a Custom Spillway Design
The clearest path to a spillway that matches what you pictured is arriving at the first design conversation with specifics, not just inspiration photos.
Bring reference images, but be explicit about which element you’re responding to in each one: is it the tile color, the spill width, the sound, or the lighting? A photo alone leaves room for a builder to interpret the wrong detail as the priority. Naming raise height, spill width, and material together gives a design team enough to model accurately.
Ask specifically how the spa will be plumbed before finishes are chosen. Whether you’re running a shared loop or an isolated one changes equipment sizing, valve placement, and sometimes even where the spa can physically sit relative to the equipment pad. This is a structural and mechanical conversation, not an aesthetic one, and it needs to happen before tile selection, not after.
Request a 3D preview if your builder offers one. Seeing raise height, spill width, and tile finish rendered together catches mismatches between what you imagined and what’s actually being built, before concrete gets poured. Finally, get phases, equipment specifications, and finish selections written into the contract explicitly. Vague scope language is the most common source of disputes on retrofit projects, and a firm with an in-house design and construction process can usually walk you through each phase before you sign anything.
Where the Real Decision Point Actually Sits
Most spillway advice focuses on the visual, and that’s understandable since the water effect is what sells the backyard. But the research behind this article points somewhere less glamorous: the shared-loop versus isolated-loop decision matters more to long-term satisfaction than tile color ever will. Homeowners who skip that conversation often end up frustrated months later, either paying to heat an entire pool just to enjoy a hot spa, or wishing they’d sprung for independent control from the start.
Conventional advice treats retrofits as a tile and lighting project. It’s really a structural and mechanical project with a tile and lighting layer on top. The bond beam tie-in, the equipment sizing, and the valve configuration determine whether the finished feature performs the way it looks in the rendering.
If you’re planning a spillway, prioritize the plumbing conversation first, the structural assessment second, and the aesthetic choices third. Get those first two right, and the tile decision becomes the easy, enjoyable part of the project instead of a scramble to fix something underneath it.
— Philipp
Ready to Build a Custom Spillway? Here’s the Low-Risk Path
Skipping the guesswork on bond beam tie-ins, valve configuration, and equipment sizing is the biggest advantage of working with a design-build firm instead of piecing a retrofit together yourself. Uniquecompanies handles design, permitting, and construction in-house, which means the same team that draws your spillway concept is the one confirming it’s structurally sound and correctly plumbed before a shovel touches the deck.

That in-house structure is also why 3D previews matter so much on a project like this. You see raise height, spill width, and tile finish rendered together before committing to demolition, which catches the kind of mismatch that turns into a change order mid-project. With more than 24 years building custom pools, spas, and outdoor living spaces across Scottsdale, Chandler, Queen Creek, and the surrounding Phoenix area, Uniquecompanies has run into nearly every retrofit surprise a backyard can produce, and plans around it up front. If you’re ready to see what a custom spillway could look like on your own property, explore custom pool features and request a design consultation to get a real plan, not just a rendering, in hand.
Sources
For more design inspiration, see luxury property feature ideas or browse custom spa concepts and pool remodeling services from Uniquecompanies for retrofit-specific guidance.
- Spillover Spa Ideas: Raised Spa That Spills Into the Pool | PoolPad
- Adding a Spa to an Existing Pool: Everything You Need to Know
- Adding a hot tub to an existing pool | PoolsWiki