TL;DR:
- A landscape design process transforms outdoor spaces by integrating hardscape and softscape elements through a structured sequence. Proper site analysis, goal setting, and hardscape installation lay the foundation for successful planting and long-lasting results. Focusing on accurate documentation, consistent style, and drainage planning prevents costly mistakes and guides effective landscape creation.
A landscape design process tutorial is a step-by-step method for transforming an outdoor space into a functional, visually balanced environment by integrating hardscape and softscape elements. Professionals call this practice horticultural design or site planning, and the same principles apply whether you hire a firm or tackle the project yourself. The process covers everything from measuring your yard and mapping sun exposure to selecting plants and installing irrigation. Following a structured sequence prevents costly mistakes and produces results that hold up over time. Uniquecompanies has spent over 24 years guiding Phoenix-area homeowners through exactly this kind of planning.
How to analyze your site and prepare your base plan
Site analysis is the foundation of every successful landscape design. Skipping it leads to plants placed in the wrong light conditions, drainage problems, and hardscape that conflicts with buried utilities.
What to document during your site inventory
Start by walking your property and recording every fixed element. Your inventory should include:
- Property boundaries and setback lines
- Existing structures: house, garage, sheds, fences
- Mature trees and shrubs you plan to keep
- Utility lines, meters, and access points
- Slopes, low spots, and drainage paths
- Prevailing wind direction
Each of these elements becomes a constraint or an asset in your design. Knowing where your gas meter sits, for example, determines where you cannot build a permanent structure.
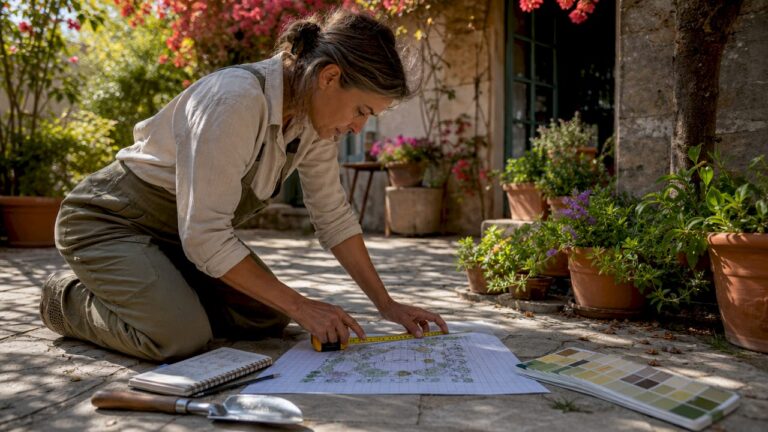
Drawing your base plan to scale
Drawing a base plan at a scale of 1/4 inch per 1 foot is the industry standard for accurate site documentation. That scale fits most residential lots onto a standard sheet of graph paper while keeping measurements readable. Digital tools like AutoCAD LT or free browser-based apps work equally well if you prefer a screen over paper.
Once your base plan is drawn, map your sun and shade zones. Full sun requires 6+ hours of direct light daily, part sun falls between 3 and 6 hours, and full shade receives under 3 hours. Observe your yard at three different times: morning, midday, and late afternoon. Conditions change by season, so a spot that gets full sun in july may be shaded by a neighboring structure in december.
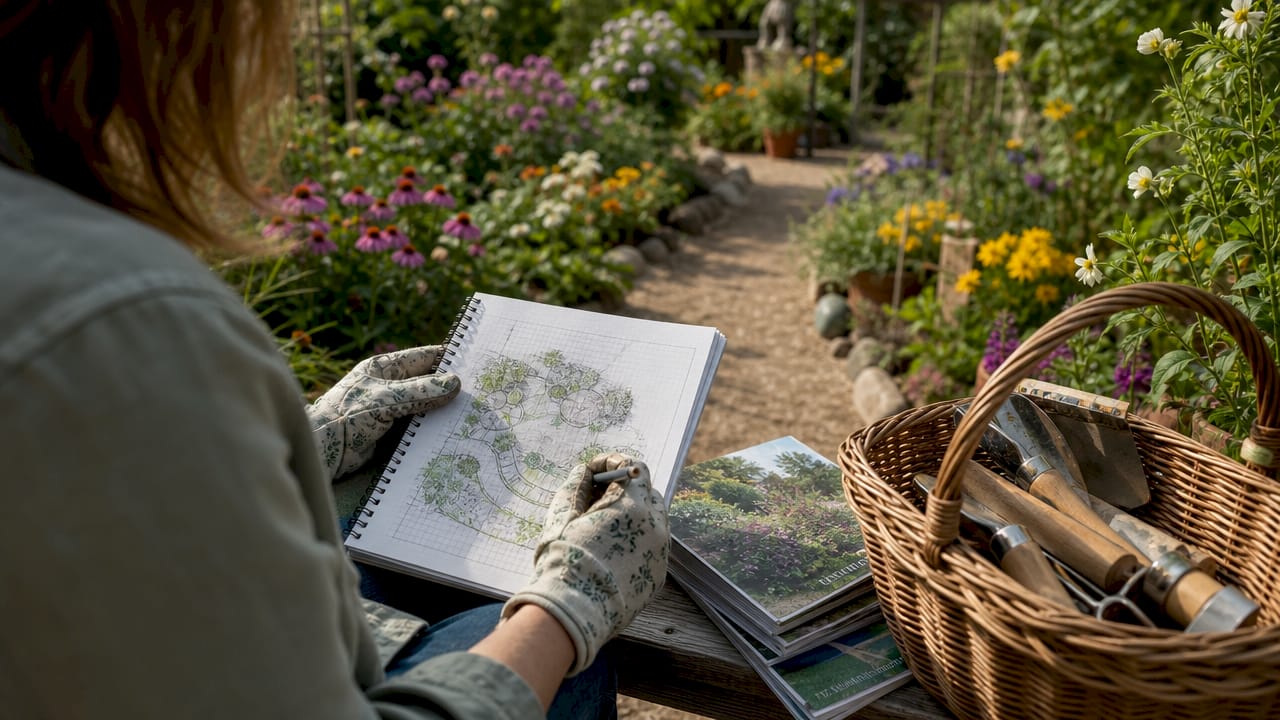
Pro Tip: Use bubble diagrams before committing to a detailed layout. Draw loose, overlapping circles on a copy of your base plan to test where entertaining, play, gardening, and relaxation zones could sit. Bubble diagrams let you experiment with circulation and zone placement without the pressure of precise measurements.
Tools you need for site documentation
| Tool | Purpose |
|---|---|
| 100-foot tape measure | Measuring property boundaries and structures |
| Graph paper or digital app | Drawing the base plan to scale |
| Compass | Determining true north for sun mapping |
| Marking flags | Flagging utility lines and drainage paths |
| Camera or smartphone | Photographing existing conditions |
How to define your goals and conceptualize a design style
Clear goals prevent the most common DIY landscaping mistake: lacking a clear style direction, which produces incoherent, cluttered results that reduce both beauty and function. Before selecting a single plant or paver, write down how you want to use your outdoor space.
Defining your use cases
Ask yourself which of these activities matter most to you:
- Outdoor entertaining and dining
- Children’s play areas
- Vegetable or herb gardening
- Relaxation and privacy screening
- Pet-friendly open lawn
- Low-maintenance curb appeal
Each use case has different space, surface, and plant requirements. An entertaining zone needs a level hardscape surface and good lighting. A vegetable garden needs full sun and easy water access. Mixing these needs without a plan produces a yard that serves none of them well.
Choosing a consistent design style
A cohesive design style established early guides every plant and material choice that follows. Common residential styles include formal symmetry, modern minimalism, cottage garden, desert xeriscape, and tropical. Pick one and commit to it. A xeriscape yard in Phoenix, for example, uses gravel mulch, native succulents, and clean geometric lines. Mixing that with a cottage-style perennial border creates visual conflict that no amount of expensive plants will fix.
Pro Tip: Collect photos of yards you admire before drawing anything. Pin them to a physical board or a free app like Pinterest. Patterns in what you save will reveal your true style preference faster than any design quiz.
Climate and microclimate conditions also shape your choices. Accounting for microclimate factors like wind corridors and drainage early prevents costly problems later. A low corner of your yard that collects cold air in winter will kill frost-sensitive plants regardless of how well you water them.
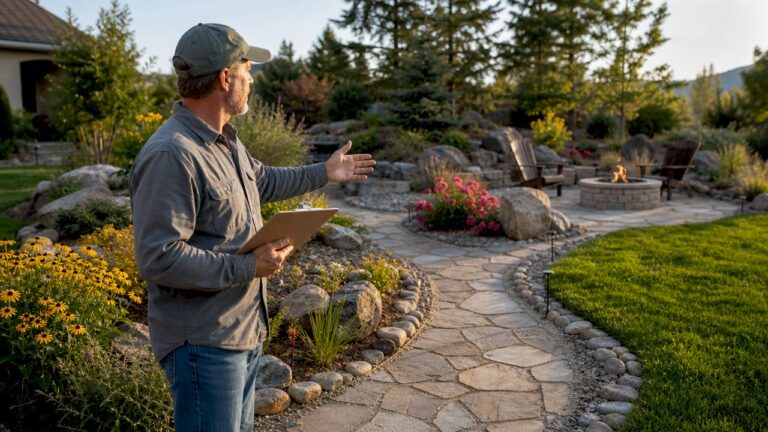
How to plan and design hardscape features before planting
Hardscape elements form the skeleton of a landscape. Patios, paths, retaining walls, pergolas, and outdoor kitchens define the structure that plants grow around. Installing hardscape first protects plants from construction damage and prevents you from tearing up new plantings to run conduit or drainage pipe.
The correct installation sequence
Follow this order on every residential project:
- Grading and drainage. Establish final grade and confirm water flows away from structures.
- Utility marking. Call 811 to have underground lines marked. Finalize drainage and utility placements before any digging begins.
- Hardscape installation. Build patios, paths, walls, and pergolas.
- Irrigation and lighting rough-in. Run lines and conduit before soil is disturbed by planting.
- Trees and large shrubs. Plant the largest elements first while equipment can still access the site.
- Smaller shrubs and perennials. Fill in mid-layer plantings.
- Groundcovers and mulch. Finish with the lowest layer and surface treatments.
Skipping step 2 is the most expensive mistake homeowners make. Retrofitting drainage after a patio is poured can cost several times more than planning it correctly from the start.
Common hardscape elements for residential projects
- Concrete, flagstone, or paver patios
- Decomposed granite or gravel pathways
- Retaining walls for sloped sites
- Pergolas and shade structures
- Outdoor kitchens and built-in grills
- Fire pits and fire features
- Decorative boulders and edging
Pro Tip: Mark every utility line and drainage swale directly on your base plan in a bright color before you design anything else. Treat these as permanent structural boundaries that no feature can cross. Uniquecompanies uses this exact approach on every Phoenix hardscape project to prevent conflicts between structural features and buried infrastructure.
How to select and arrange plants for optimal health and aesthetics
Plant selection follows site conditions, not personal preference alone. A plant you love that requires full shade will fail in a south-facing Arizona yard no matter how well you care for it.
Matching plants to your site conditions
Your sun zone map from the site analysis phase now becomes your plant selection guide. Full-sun zones support heat-tolerant species like desert willow, lantana, and agave. Part-sun areas work well for Texas sage and autumn sage. Full-shade zones near walls or under canopies suit ferns, cast iron plant, and shade-tolerant groundcovers.
Beyond light, match plants to your soil type and moisture conditions. Soil structure improvements pay higher dividends than expensive nursery stock. A $15 shrub planted in well-amended, properly draining soil will outperform a $150 specimen dropped into compacted clay.
Layering plants for visual depth and function
Arrange plants in three layers to create a natural, finished look:
- Canopy trees: 20+ feet tall, provide shade and structure
- Mid-layer shrubs: 3–15 feet, define spaces and add seasonal color
- Groundcovers and low perennials: under 3 feet, suppress weeds and finish beds
Grouping plants with similar water needs together also creates microclimate benefits. Dense plantings reduce soil temperature, retain moisture, and reduce the irrigation demand of individual plants. This principle, called hydrozoning, is standard practice in residential landscape planning and reduces long-term water costs significantly.
Color, texture, and seasonal interest complete the picture. Pair fine-textured plants like ornamental grasses with bold-leafed specimens like agave to create contrast. Plan for at least two seasons of bloom so the yard looks intentional year-round, not just in spring.
How to prepare soil, install irrigation, and finalize your landscape
Soil preparation determines whether your plants thrive or merely survive. Most residential soils, especially in the Phoenix area, are compacted, alkaline, and low in organic matter.
Final installation steps in order
- Soil amendment. Add compost at a rate of 3–4 inches worked into the top 12 inches of soil. Test pH and adjust if needed before planting.
- Grading check. Confirm final grade slopes away from the house foundation at a minimum of 2% grade.
- Irrigation installation. Install drip lines and spray heads after hardscape is complete. Zone plants by water need, not by location alone.
- Lighting installation. Run low-voltage landscape lighting conduit alongside irrigation lines to avoid future trenching.
- Planting. Follow the sequence from the hardscape section: trees first, then shrubs, then groundcovers.
- Mulching. Apply 3 inches of organic or inorganic mulch over all planting beds. Mulch reduces evaporation, moderates soil temperature, and suppresses weeds.
Drainage planning is the step homeowners most often skip until water pools against their foundation or floods a patio. Fix drainage at the grading stage. Retrofitting it after installation is expensive and disruptive.
Pro Tip: Set up a simple maintenance calendar before you plant the first tree. Note watering schedules by season, fertilizing dates, and pruning windows for each plant species. A written plan prevents the neglect that kills most new landscapes in the first two years.
Key takeaways
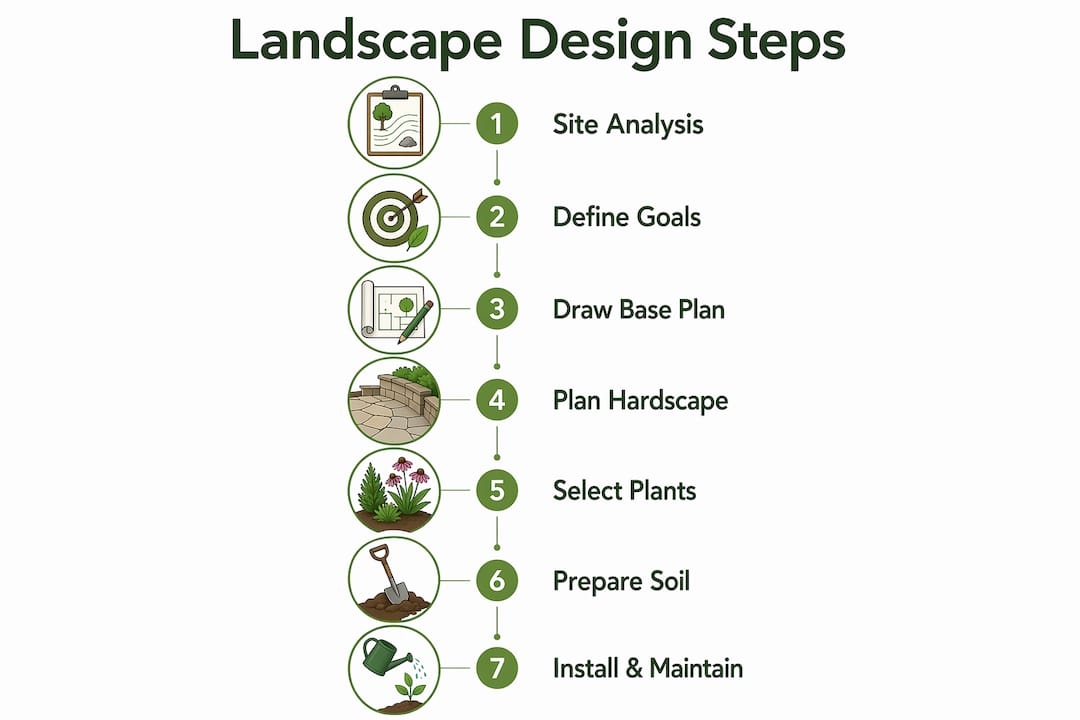
A successful landscape design process starts with accurate site documentation and follows a fixed sequence: site analysis, goal setting, hardscape installation, plant selection, and soil preparation.
| Point | Details |
|---|---|
| Draw a scaled base plan first | Use the 1/4 inch = 1 foot standard to map boundaries, structures, and utilities accurately. |
| Establish a clear design style early | A consistent style direction prevents mismatched plants and materials that reduce visual quality. |
| Install hardscape before planting | Building patios, walls, and paths first protects plants and prevents costly retrofits. |
| Match plants to site conditions | Sun zones, soil type, and moisture levels determine plant survival more than species preference. |
| Prioritize soil and drainage over plants | Investing in soil amendment and proper grading produces healthier results than expensive nursery stock. |
What I’ve learned from watching homeowners design their own yards
The biggest gap I see between a successful DIY landscape and a frustrating one is not budget or plant knowledge. It is the willingness to spend time on the unglamorous work before anything goes in the ground.
Homeowners consistently underestimate the design development phase, where you reconcile your vision with zoning setbacks, utility locations, and drainage realities. That phase feels slow. Nothing visible happens. But every hour spent there prevents a week of corrective work later.
The other pattern I notice is that people skip the style decision because it feels abstract. They buy plants they like at the nursery and arrange them by color. The result is a yard that looks busy rather than designed. Committing to one style direction, even a simple one, changes everything. A clean xeriscape with three plant species and consistent gravel mulch looks more intentional than a yard with twenty species and no visual logic.
My honest recommendation: start smaller than you think you need to. Design one zone completely before moving to the next. Learn how your site behaves through one full season before making permanent decisions about the rest. The homeowners I see most satisfied with their results are the ones who treated the first phase as a learning project, not a finished product. You can always avoid common landscape mistakes by planning deliberately rather than reacting to problems after they appear.
— Philipp
When your landscape project calls for professional expertise
Uniquecompanies brings over 24 years of experience designing and building luxury outdoor environments across Scottsdale, Chandler, Queen Creek, and the greater Phoenix area. When your landscape plan includes a custom pool, outdoor kitchen, or fire feature, the design and construction complexity increases significantly.
Uniquecompanies handles design, permitting, and construction in-house, which means your pool, hardscape, and planting plan are developed as one coordinated project rather than separate contracts. Their team uses 3D design visualization so you can see the finished space before a single shovel breaks ground. If your outdoor living goals include custom pool features or a fully equipped outdoor kitchen, Uniquecompanies can integrate those elements into a cohesive design that works with your landscape from day one.
FAQ
What is the first step in the landscape design process?
The first step is a complete site inventory: measuring property boundaries, documenting structures, mapping sun and shade zones, and locating utilities. This base plan becomes the foundation for every design decision that follows.
What scale should I use for a landscape base plan?
The industry standard is 1/4 inch per 1 foot. That scale fits most residential lots on a standard sheet of graph paper and keeps measurements accurate enough to avoid layout errors during installation.
Should hardscape or planting come first?
Hardscape always comes first. Installing patios, paths, and walls before planting prevents construction equipment from damaging plants and eliminates the need to tear up new plantings to run drainage or utility lines.
How do I choose the right plants for my yard?
Match plants to your documented sun zones, soil type, and moisture conditions. A plant suited to your site conditions will outperform a more expensive specimen placed in the wrong environment, regardless of how well you water it.
How do I prevent drainage problems in my landscape?
Finalize drainage placement on your base plan before designing any other features. Establish a minimum 2% grade sloping away from your foundation during the grading phase, and never treat drainage as an afterthought once hardscape is installed.