TL;DR:
- Sealing pavers protects against UV damage, stains, weeds, and extends lifespan in Phoenix’s harsh climate.
- Proper preparation, application, and regular maintenance are essential for effective sealing results.
- Professional sealing ensures longer-lasting, even coverage, ideal for luxury outdoor spaces in Arizona.
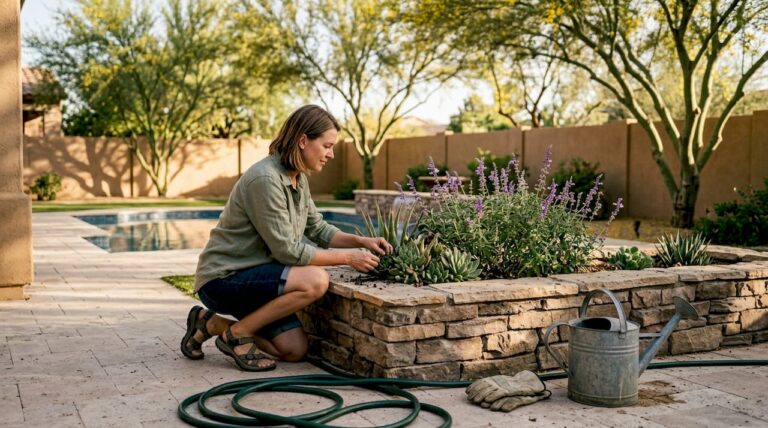
Watching your carefully chosen concrete pavers fade, stain, or sprout weeds between the joints is genuinely frustrating, especially after investing in a luxury outdoor space. Phoenix’s intense UV exposure, extreme heat cycles, and monsoon season create conditions that break down unsealed paver surfaces faster than almost anywhere else in the country. Sealing your pavers is the single most effective way to preserve their color, block stains, and extend their lifespan. This guide walks you through exactly why sealing matters, what materials you need, how to apply sealer correctly, and how to maintain your results over time.
Table of Contents
- Why seal your concrete pavers?
- What you need: Tools, materials, and prep work
- Step-by-step: How to seal your concrete pavers
- Verifying your results and maintaining sealed pavers
- Our take: Why professional sealing beats DIY in Phoenix
- Get lasting beauty and durability with our expert sealing services
- Frequently asked questions
Key Takeaways
| Point | Details |
|---|---|
| Sealing prevents damage | A quality sealer shields pavers from stains, UV fading, and weather-related cracks. |
| Preparation is key | Thorough cleaning and dry surfaces ensure the sealer bonds and lasts longer. |
| Follow correct steps | Proper application and maintenance keep your outdoor spaces looking beautiful and safe. |
| Professional service advantages | Experts deliver longer-lasting results and reduce the risk of DIY mishaps. |
Why seal your concrete pavers?
Let’s begin by addressing why sealing pavers is more than just a cosmetic upgrade. In Phoenix, the combination of relentless UV radiation, temperatures that swing from 115°F in summer to near freezing in winter, and the occasional heavy monsoon rain creates a punishing environment for outdoor surfaces. Unsealed pavers absorb moisture, oils, and debris at the surface level, which accelerates cracking, staining, and color loss.
Sealing creates a protective barrier on the paver surface that repels water, resists oil and grease, and locks in color. As noted in guidance on paver project outcomes, sealing prevents color fading and resists stains from everyday outdoor use. That matters a great deal in backyards where BBQ grease, rust from metal furniture, and pool chemicals are constant threats.
The benefits of paver sealing extend well beyond appearance. Here is a quick summary of what a quality sealer does for your outdoor space:
- Blocks stains from oil, grease, food spills, and rust before they penetrate the surface
- Slows UV degradation that causes paver color to bleach out over time
- Reduces weed and moss growth by filling joint gaps that seeds otherwise colonize
- Makes cleaning easier since sealed surfaces resist grime and rinse clean faster
- Extends paver lifespan, reducing the need for costly repairs or replacements
- Enhances surface color, giving pavers a refreshed, polished appearance
According to Bob Vila’s sealing pavers advice, resealing every two to three years is standard practice to keep pavers performing well under heavy sun and foot traffic.
Statistic callout: Unsealed pavers in high-UV climates like Phoenix can show visible color degradation within just 12 to 18 months of installation without protective treatment.
Pro Tip: If you have travertine pavers or other natural stone surfaces, confirm you are using a sealer rated for that specific material. Not all sealers are compatible with every paver type, and using the wrong product can trap moisture or alter the stone’s natural appearance.
The bottom line is that sealing is a relatively low-cost maintenance step that protects a significant investment. Skipping it in Phoenix’s climate is simply not a practical choice for homeowners who want their outdoor spaces to look and perform at a high level for years.
What you need: Tools, materials, and prep work
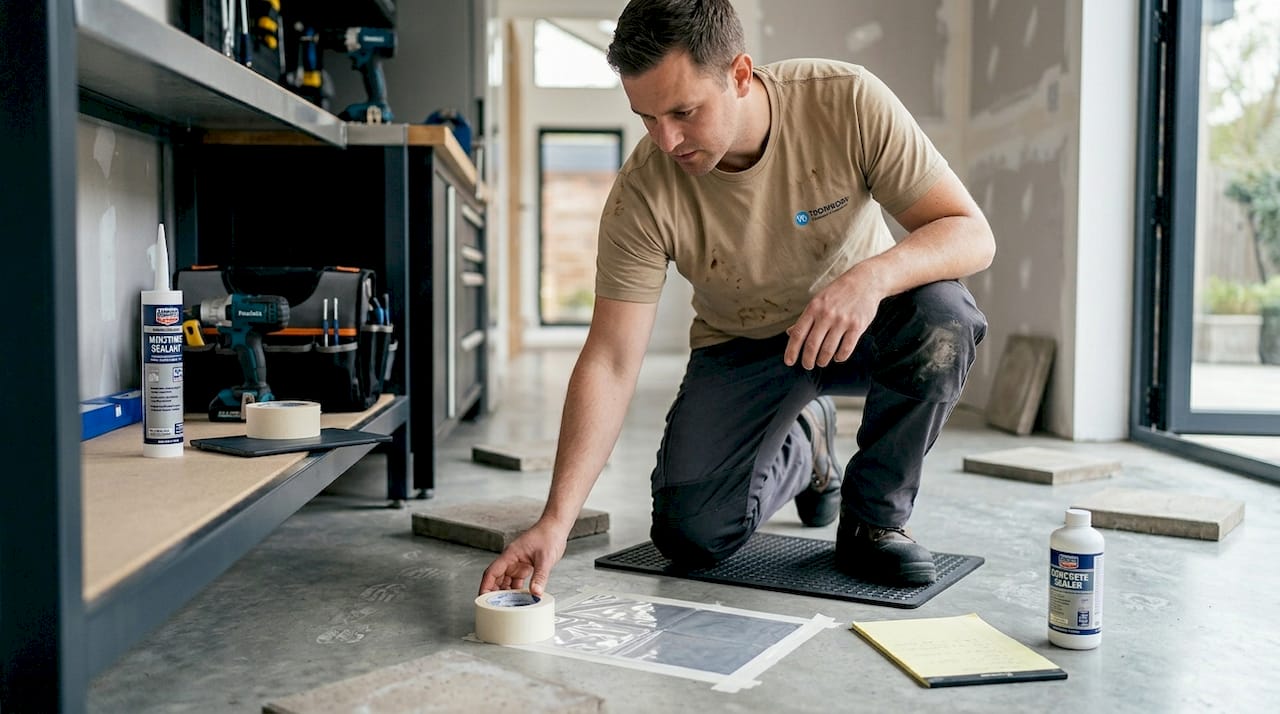
Once you understand the value of sealing, it’s essential to have the right tools and prep for best results. Rushing into application without proper preparation is the most common reason DIY sealing jobs fail. As highlighted in guidance on paver project essentials, proper preparation is vital for long-lasting sealing results.
Here is a reference table covering the key tools and materials you will need:
| Item | Purpose | Notes |
|---|---|---|
| Concrete paver sealer | Primary protective coating | Choose water-based or solvent-based depending on finish preference |
| Pump sprayer or roller | Sealer application | Sprayer for large areas; roller for tight spaces |
| Pressure washer | Deep surface cleaning | 1500 to 3000 PSI recommended |
| Paver cleaner or degreaser | Remove stains and organic growth | Use a pH-neutral formula safe for pavers |
| Joint sand (polymeric) | Refill gaps before sealing | Prevents weed growth and stabilizes joints |
| Safety goggles and gloves | Personal protection | Required when handling solvents |
| Painter’s tape and plastic sheeting | Protect adjacent surfaces | Especially important near pools and planters |
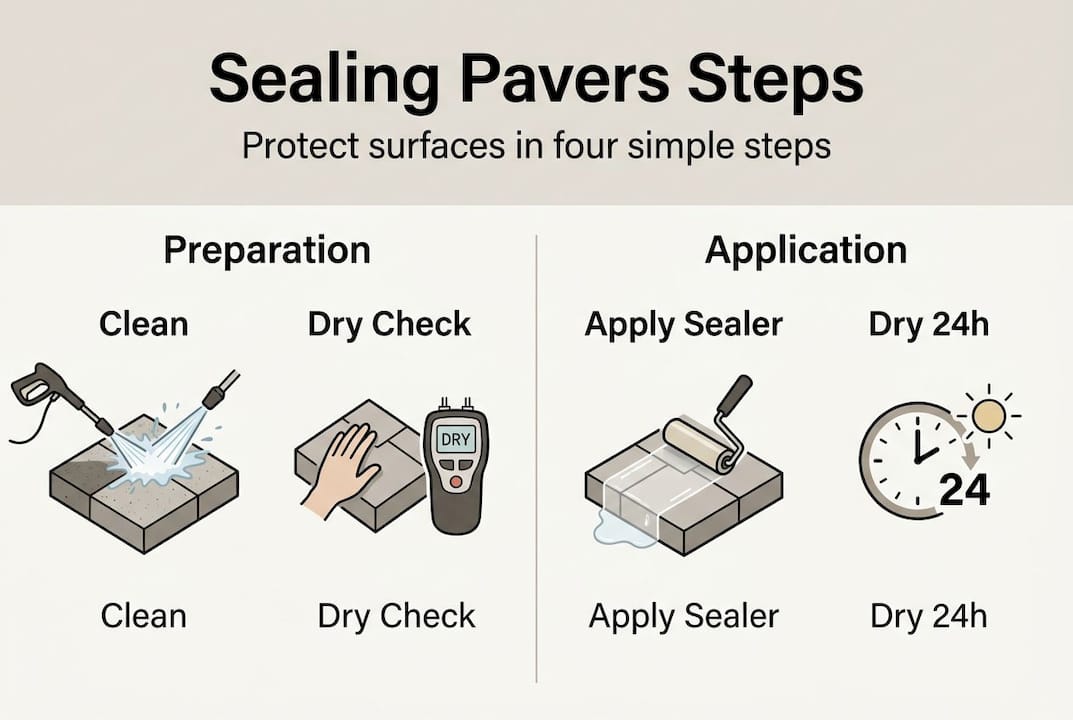
Once your materials are assembled, follow these preparation steps in order:
- Clear the area by removing all furniture, planters, and decorative items
- Pressure wash the entire surface to remove dirt, algae, and old sealer residue
- Treat stains individually with a targeted degreaser before the full wash
- Inspect for cracked or loose pavers and repair them before sealing
- Refill joint sand if gaps are visible after cleaning
- Allow the surface to dry completely, which typically takes 24 to 48 hours in Phoenix’s dry climate
The Family Handyman’s sealing steps emphasize that any moisture trapped beneath the sealer will cause it to cloud or peel, which is a costly mistake to fix.
Pro Tip: Check the weather forecast for at least 48 hours before you plan to seal. Even in Phoenix, unexpected humidity or a surprise monsoon shower can ruin a fresh sealer application. Aim for days with low humidity and temperatures between 50°F and 90°F for the best cure.
Step-by-step: How to seal your concrete pavers
Now you’re ready to tackle the main event, actually sealing your pavers the right way. Applying paver sealer enhances and protects outdoor surfaces when done correctly, but the technique matters as much as the product. Follow these steps carefully.
- Test a small area first. Apply sealer to an inconspicuous corner and let it cure for 24 hours. Confirm the finish and color enhancement match your expectations before committing to the full surface.
- Apply the first coat. Use a pump sprayer for large open areas or a short-nap roller for tighter sections. Work in small sections, moving in one consistent direction to avoid lap marks.
- Spread evenly and avoid pooling. Thin, even coats outperform thick applications. Thick sealer pools create a white haze (called blushing) that is difficult to remove.
- Allow the first coat to dry. In Phoenix’s heat, this typically takes 1 to 2 hours, but follow the manufacturer’s specific instructions.
- Apply the second coat. Cross-hatch the direction of your second coat relative to the first for more even coverage.
- Allow full cure time. Most sealers require 24 to 48 hours before foot traffic and 72 hours before vehicle traffic.
Here is a quick comparison of the two most common application methods:
| Method | Best for | Pros | Cons |
|---|---|---|---|
| Pump sprayer | Large patios, driveways | Fast, even coverage | Overspray risk near plants |
| Roller | Small areas, edges | Precise control | Slower on large surfaces |
Safety note: Many solvent-based sealers release VOCs (volatile organic compounds) during application. Even outdoors, ensure good airflow around the work area and avoid applying near open flames or ignition sources. Wear a respirator rated for organic vapors if using solvent-based products.
For troubleshooting, streaks usually result from overlapping wet sealer with dried sealer. White haze indicates moisture was trapped or the coat was too thick. Missed spots are easy to catch by viewing the surface at a low angle in direct sunlight. Review paver patio design tips for guidance on surface planning that makes future maintenance simpler. The Houzz patio maintenance guide also offers useful troubleshooting advice for common sealing issues.
Verifying your results and maintaining sealed pavers
Completing the sealing process is only half the journey. Here’s how to ensure your investment lasts. The first check is simple: once the sealer has cured, sprinkle water on the surface. If it beads up and rolls off, the sealer has bonded correctly. If water soaks in, you likely have thin coverage or missed sections that need a touch-up coat within 24 hours while the sealer is still fresh.
As reinforced in guidance on elegant paver installation, routine maintenance preserves both the performance and look of sealed pavers over time. Build these habits into your regular outdoor maintenance schedule:
- Rinse pavers monthly with a garden hose to remove dust, pollen, and debris
- Spot clean spills immediately before they have time to penetrate the sealer
- Inspect joints seasonally and add polymeric sand if gaps have opened
- Check sealer performance annually using the water bead test described above
- Plan for resealing every 2 to 3 years depending on traffic and sun exposure
The clearest signs that resealing is overdue include water soaking in rather than beading, visible color fading compared to shaded areas, and stains that appear even after cleaning. According to Angi’s paver sealing analysis, high-traffic areas in sunny climates often need attention on the shorter end of that resealing window.
Pro Tip: Use only paver-friendly, pH-neutral cleaning products on sealed surfaces. Harsh acid-based cleaners or bleach can break down the sealer bond prematurely, meaning you will need to reseal far sooner than expected. Check the sealer manufacturer’s recommendations for compatible cleaning products.
If you notice large sections of sealer peeling, significant color inconsistency, or deep staining that cleaning cannot address, those are signals to consider professional sealing services. A professional team can strip old sealer, perform a deep clean, and apply a commercial-grade product that outperforms consumer options.
Our take: Why professional sealing beats DIY in Phoenix
While maintaining sealed pavers keeps them looking top-notch, the question of whether to DIY or call in the experts deserves a candid answer. We have seen the results of both approaches across hundreds of Phoenix-area projects, and the difference is consistent.
DIY sealing kits available at home improvement stores are formulated for general use. They are not engineered for the specific demands of Phoenix’s UV intensity, temperature extremes, or the variety of paver materials used in luxury outdoor spaces. Homeowners applying sealer for the first time frequently miss patchy areas, apply coats too thick, or seal over surfaces that were not fully dry, all of which lead to costly corrections.
Timing and technique are especially critical here. Arizona’s rapid evaporation rate means sealer can begin setting before it has spread evenly, creating visible inconsistencies. Professionals bring commercial-grade equipment, specialty sealers matched to your specific paver type, and the experience to work efficiently within the right temperature and humidity window. For expert paver project outcomes in a luxury outdoor space, professional sealing is simply the more reliable path.
Get lasting beauty and durability with our expert sealing services
If you want guaranteed results without the risk of costly mistakes, our team is ready to help. We specialize in luxury outdoor living environments across Phoenix, Scottsdale, Chandler, and Queen Creek, and our hardscape work is built to perform in Arizona’s demanding climate.
Our Phoenix hardscape experts handle everything from surface preparation to final sealer application, using commercial-grade products matched to your specific paver material. Whether you are protecting a new installation or refreshing an existing patio, explore the benefits of UNIQUE Hardscape and see how our approach delivers results that hold up year after year. Contact us to schedule a consultation and take the first step toward a low-maintenance, beautiful outdoor space.
Frequently asked questions
How often should concrete pavers be sealed in Phoenix?
Most experts recommend resealing every 2 to 3 years, given Phoenix’s intense UV exposure and temperature swings. High-traffic areas or surfaces in full sun may need attention closer to the two-year mark, as supported by guidance on paver maintenance.
Can I seal my own pavers, or should I hire a professional?
DIY sealing is possible with the right preparation, but professionals achieve more even, longer-lasting results and significantly reduce the risk of common mistakes like blushing or patchy coverage. Applying sealer professionally ensures the product is matched correctly to your paver type and climate conditions.
Will sealing my pavers make them slippery?
Most quality sealers are formulated to maintain traction on outdoor surfaces, but high-gloss finishes can become slick when wet. Ask your installer about matte or satin finish options, or request an anti-slip additive, since sealing prevents fading without sacrificing safety when the right product is chosen.
How do I know if pavers need to be resealed?
If water no longer beads on the surface, colors look visibly faded, or stains are absorbing into the paver rather than wiping off, it is time to reseal. These are reliable indicators that the protective barrier has worn down, and routine maintenance checks help you catch this before damage progresses.