For most homeowners, the choice comes down to four clear use cases. Lynx leads for luxury entertaining, with all-welded 304 stainless construction and ProSear infrared burners that hold up in coastal and desert climates alike. Blaze is the strongest value-to-durability pick, offering 304 stainless at a price point well below the luxury tier. Twin Eagles or Fire Magic are the top choices for serious searing, with high-output infrared options and heavy-gauge construction. For large-format cooking and party-scale capacity, Napoleon’s Prestige PRO 825 RBI delivers the cooking area and feature set most families need, including infrared sear burners, a rear rotisserie burner, and ceramic radiant briquettes.
Quick-reference shortlist by use case:
- Luxury entertainer: Lynx Professional Series (36" or 42") — all-welded 304 stainless, ProSear infrared, lifetime warranty on main burners
- Best value with durability: Blaze Professional LUX — 304 stainless at a mid-range price, widely available through BBQGuys and appliance dealers
- Top sear/infrared performance: Fire Magic Echelon Diamond or Twin Eagles — high-BTU infrared burners, heavy-gauge construction
- Large-format/party cooking: Napoleon Prestige PRO 825 RBI — wide cooking area, infrared sear, rear rotisserie burner, integrated lighting
- Mid-range workhorse: DCS Series 9 or Coyote C-Series — professional-grade features without the luxury price premium
- Premium alternative: Alfresco ALXE or Viking 5 Series — strong dealer networks, solid warranty coverage
Key Takeaways
The most critical decision in any built-in grill project is selecting the exact model before island construction begins, because the cutout diagram, ventilation requirements, and jacket specifications all drive the build.
| Point | Details |
|---|---|
| Confirm cutout before building | Use the model-specific cutout diagram, not the exterior width, to frame or pour the island. |
| Decide fuel type early | Natural gas and propane require different vent placement and island configurations; change orders after construction are costly. |
| Specify 304 stainless minimum | For Arizona’s desert climate or any coastal environment, 304 stainless resists corrosion significantly better than 430 grade. |
| Size the hood to the BTU output | Plan roughly 100 CFM per 10,000 BTU of grill output for any covered patio installation. |
| Uniquecompanies turnkey service | Uniquecompanies manages grill selection, island construction, permitting, and installation for Phoenix-area homeowners in one contracted project. |
Table of Contents
- Which built-in grills compare best side by side?
- How do you choose the right built-in grill for your outdoor kitchen?
- What maintenance does a built-in grill actually need?
- What are the installation rules and clearances for built-in grills?
- How were these brands and models selected?
- A builder’s perspective on what actually goes wrong
- Uniquecompanies builds the outdoor kitchen around the grill you choose
- Sources
Which built-in grills compare best side by side?
Selecting a built-in grill means comparing brands across dimensions that matter specifically for permanent installation: cutout width, stainless grade, BTU output, and dealer support for service. The table below reflects spec-sheet data and manufacturer model information current to 2026; confirm the current spec sheet before final purchase.
Price-range and installation notes:
- Luxury models (Lynx, Twin Eagles, Alfresco) typically require masonry or steel-framed islands; combustible framing requires an insulated jacket, which adds cost and changes the cutout dimension.
- Blaze and Coyote are among the most install-friendly for combustible framed islands, with clear jacket requirements documented in their installation manuals.
- Napoleon’s Prestige PRO 825 RBI is a feature-rich luxury model with infrared sear burners, rear rotisserie, ceramic radiant briquettes, and integrated lighting — all of which raise both installation complexity and long-term maintenance considerations.
Pro Tip: High-BTU models (above 60,000 BTU total output) need a hood sized to match. Industry guidance recommends roughly 100 CFM per 10,000 BTU of grill output — a 75,000 BTU grill under a covered patio needs at least a 750 CFM hood to manage heat and smoke effectively.
How do you choose the right built-in grill for your outdoor kitchen?
The right model depends on three things: how you cook, the island you plan to build, and the fuel source available at your site. Settle those three before you look at a single spec sheet.
Cutout dimensions vs. exterior size
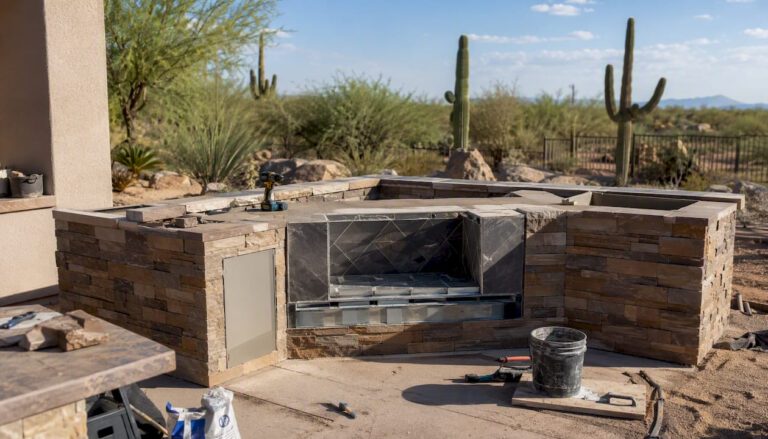
The most common and costly mistake in outdoor kitchen planning is designing the island to the grill’s exterior dimensions rather than its published cutout. A built-in grill’s cutout width, depth, and height are model-specific and are never the same as the exterior size. Get the manufacturer’s cutout diagram before your contractor pours a single footing or frames a single stud. Changing a masonry island after the fact is expensive; changing a steel-framed island is less so, but still disruptive.
If you’re designing an outdoor kitchen from scratch, the grill model selection should happen at the design stage, not after the island is built.
Natural gas vs. propane
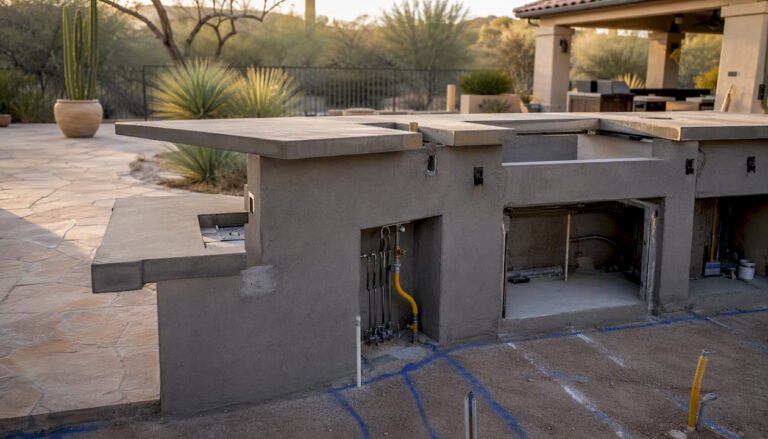
Natural gas is the preferred fuel for permanent built-ins: no tank swaps, consistent pressure, and lower long-term cost per BTU. Propane works well where a gas line is not available, but the tank compartment in the island requires specific ventilation (low vents near the base of the enclosure) and heatshield compliance per the manufacturer’s tech bulletin. Natural gas vents higher in the enclosure. The choice affects island design, so confirm fuel availability before finalizing the island layout.
Sizing rules of thumb
Plan roughly 100 in² of cooking area per typical guest, and consider a 36" class grill (roughly 650–800 in² of primary cooking area) as the versatile middle ground for most families. If you regularly cook for 10 or more people, a 42" or 48" class model makes practical sense. Cooking habits matter too: a household that grills proteins daily needs more primary grate space than one that entertains occasionally.
Materials checklist
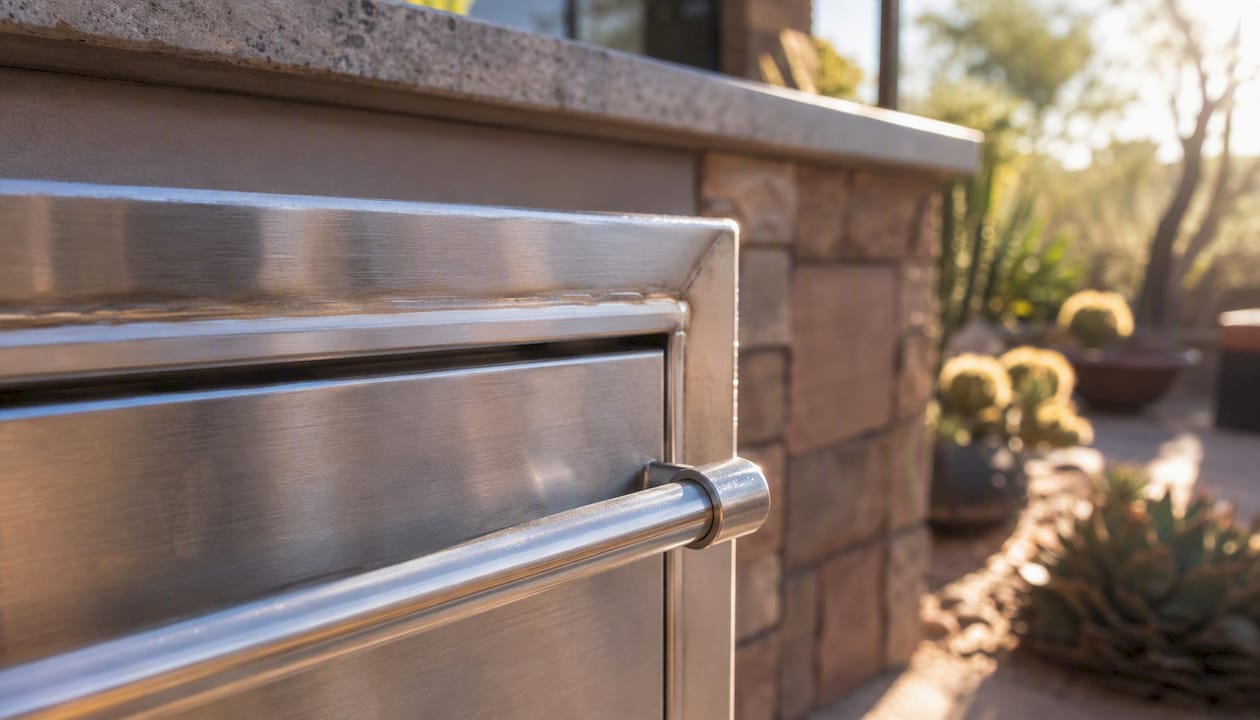
304 stainless steel is the recommended baseline for any permanent, weather-exposed built-in. It resists corrosion significantly better than 430 stainless, which is more economical but degrades faster in harsh conditions. In Arizona’s desert climate, UV exposure and temperature cycling are the primary stressors; in coastal environments, salt air accelerates corrosion on any grade below 304. For coastal installations, some builders specify 316 marine-grade stainless on exposed surfaces. Welded construction (rather than bolted) is a durability indicator worth asking about at the dealer.
Warranty and service checklist
Warranty terms vary widely across brands. Ask your dealer:
- Does the warranty cover corrosion, or only mechanical failure?
- Is labor included, or parts only?
- Does improper island construction void the warranty?
- Is there an authorized service network in your area?
A lifetime warranty on burners is common among premium brands, but a short labor window (one to two years) means service calls after year two come out of pocket.
Questions to bring to your dealer or installer
- What is the exact cutout width, depth, and height for this model?
- Does this model require an insulated jacket for combustible framing?
- What are the minimum ventilation opening requirements for the island enclosure?
- What hood CFM do you recommend for this BTU output?
- What gas line size and regulator pressure does the manufacturer specify?
- Where should the access door be positioned for the regulator and gas shutoff?
- Are there model-specific heatshield requirements for the enclosure?
For a broader look at accessories and workflow planning, the BBQ design guide from Uniquecompanies covers layout, accessory pairing, and sequencing decisions that affect the final installation.
What maintenance does a built-in grill actually need?
Built-in grills are permanent fixtures, which means deferred maintenance compounds over time in ways that freestanding grills do not. A consistent schedule protects both the grill and the island structure around it.
Seasonal maintenance checklist
- After each use: Burn off residue on high for 10–15 minutes, then brush grates while hot.
- Monthly: Inspect burner ports for blockages (spider webs and debris are common in outdoor installations); clean grease traps and drip pans.
- Seasonally (twice per year): Remove grates and flavorizer bars; clean burner tubes; inspect igniter wires and electrodes; check gas connections for leaks using soapy water.
- Annually: Inspect the island enclosure for moisture intrusion, blocked vents, and grease accumulation near the gas line; check stainless surfaces for rust spots and treat with a stainless cleaner and protectant.
- As needed: Season cast iron grates with food-safe oil after cleaning; rotate porcelain-coated grates to even wear.
For a detailed cleaning protocol specific to built-in installations, the grill cleaning guide from Uniquecompanies covers step-by-step care that applies directly to permanent outdoor setups.
Lifespan by tier
Economy-grade built-ins (430 stainless, bolted construction) typically last 5–8 years in moderate climates before corrosion and burner failure become chronic. Mid-range models in 304 stainless with good maintenance can reach 10–15 years. Luxury-tier models with all-welded 304 or 316 stainless and proper island ventilation regularly exceed 15–20 years. What shortens life expectancy most: coastal salt exposure, poor island drainage that traps moisture under the grill, and blocked ventilation openings that concentrate heat and humidity inside the enclosure.
Warranty red flags
Watch for these terms in the fine print:
- “Cosmetic corrosion excluded” — this is the most common coverage gap; surface rust on stainless is often classified as cosmetic even when it signals deeper structural corrosion.
- Labor coverage under two years — parts-only warranties after year one mean any service call costs you the technician’s time.
- “Improper installation voids warranty” — this clause is standard, but it means a non-compliant island (wrong clearances, missing jacket, blocked vents) eliminates your coverage from day one.
Pro Tip: Proper island ventilation and an insulated jacket where required do more to extend grill life than any cleaning product. A well-ventilated enclosure prevents heat soak, reduces moisture accumulation, and keeps the gas components within their rated temperature range.
What are the installation rules and clearances for built-in grills?
Follow the manufacturer’s installation instructions first. Beyond using tested and listed appliances and following manufacturer instructions, there are no unique federal code requirements for built-in grills; local building departments and the manufacturer’s own specs are the binding technical documents. CSA/ANSI safety listings on the grill confirm the appliance has been tested to recognized standards, but the installation manual governs clearances, venting, and enclosure construction.
Practical installation numbers
| Parameter | Guideline / typical value | Notes |
|---|---|---|
| Hood CFM (covered patio) | ~100 CFM per 10,000 BTU of grill output | A 60,000 BTU grill needs ~600 CFM minimum |
| Propane enclosure vent placement | Low, near base of enclosure | Propane is heavier than air; low vents allow gas to escape |
| Natural gas enclosure vent placement | Higher in the enclosure | Natural gas rises; upper vents allow dissipation |
| Minimum vent area (propane compartment) | Per manufacturer tech bulletin | R.H. Peterson / Fire Magic tech bulletins specify minimum openings |
| Cutout width vs. nominal grill size | Nominal 36" grill: typically 35.5"–35.75" cutout | Always use the model-specific cutout diagram, not the nominal size |
| Clearance to combustibles (side/rear) | Per manufacturer spec; typically 2"–6" minimum | Varies by model; insulated jacket may reduce required clearance |
| Access door sizing | Large enough to reach gas shutoff and regulator | Position near the gas connection, not just for aesthetics |
Safety warnings for enclosed islands
Propane tank compartments require particular attention. The tank must be in a ventilated compartment separate from the grill cavity, with low vents that allow propane vapor to escape at ground level. Heatshields between the burner box and the tank compartment are required by most manufacturers. Blocking or covering these vents, even partially, creates a fire and explosion hazard and voids the warranty.
For natural gas installations, the gas line sizing and regulator pressure must match the manufacturer’s specification. Undersized supply lines cause pressure drop under full load, which affects burner performance and can trigger safety shutoffs.
Pro Tip: Order the grill model before finalizing island construction. The cutout diagram is the single most important document in the build sequence. Installers who frame the island first and fit the grill second routinely encounter cutout mismatches that require expensive rework.
The ICC’s guidance on outdoor kitchen code requirements is a useful reference to share with your local building department when pulling permits for a covered outdoor kitchen.
How were these brands and models selected?
The brands and models covered here were chosen based on four filters applied consistently across the review:
- Built-in-specific availability: Only models designed and sold as drop-in built-ins were evaluated. Freestanding cart grills, portable grills, and charcoal-only smokers were excluded unless the manufacturer also sells a purpose-built drop-in version of that model.
- Installed reliability and spec-sheet verification: Each brand’s inclusion reflects documented 304 stainless construction, published cutout diagrams, and available installation manuals. Brands without publicly accessible installation documentation were not featured.
- Dealer and install-friendliness: Brands available through established U.S. dealer networks (BBQGuys, appliance dealers, specialty outdoor kitchen retailers) were prioritized, as post-sale service and parts availability directly affect long-term ownership experience.
- Spec currency: Model and specification information reflects data current to 2026. Manufacturers update specs, cutout dimensions, and warranty terms periodically. Confirm the current spec sheet and installation manual for any model before final purchase or island construction.
The “best for” designations in the comparison table reflect use-case fit based on cooking area, BTU output, materials, and installation complexity, not paid placement or brand relationships.
A builder’s perspective on what actually goes wrong
The most common installation mistake is measuring the grill’s exterior width and building the island to that number. Cutout width is always smaller than exterior width, and the difference varies by model. A builder who frames to the exterior dimension ends up with a grill that won’t drop in, or one that sits on the counter surface instead of flush with it.
The second most common problem is ventilation planned as an afterthought. Enclosure vents need to be in the right location for the fuel type (low for propane, higher for natural gas) and sized to the manufacturer’s minimum opening area. Decorative vent covers that reduce the open area below the minimum are a safety issue, not just a code issue.
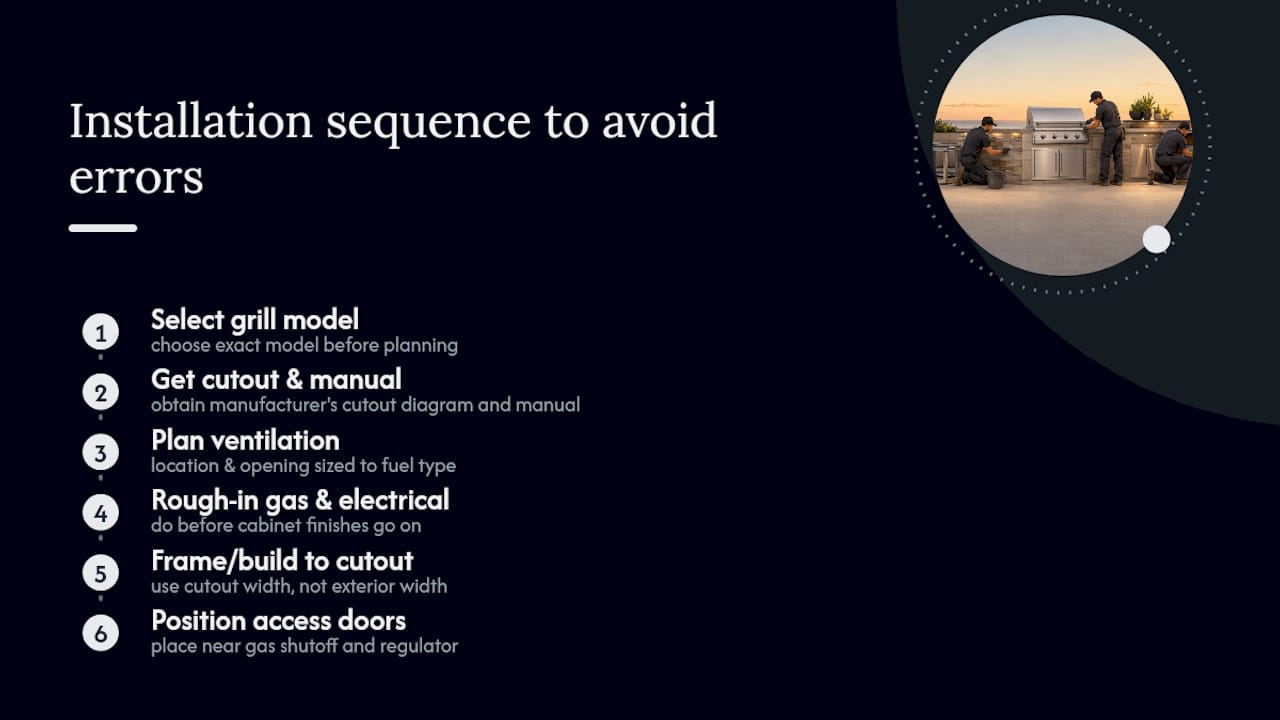
Sequencing matters more than most homeowners expect. The right order is: select the grill model, get the cutout diagram and installation manual, rough in the gas line and electrical (for lighting and igniters) before cabinet finishes go on, then frame or build the island to the cutout. Access doors should be positioned near the gas shutoff and regulator, not wherever they look best on the exterior.
For Arizona installations specifically, Uniquecompanies typically specifies 304 stainless as the minimum grade on all exposed components. The combination of intense UV, high heat, and monsoon humidity creates conditions that accelerate corrosion on lower-grade materials. Clients who invest in higher-grade stainless at the outset consistently see better long-term results than those who upgrade after early corrosion appears. You can see how this approach translates into finished projects in Uniquecompanies’ custom grill and outdoor dining installations.
Uniquecompanies builds the outdoor kitchen around the grill you choose
Choosing the right grill is only part of the project. The island, gas line, ventilation, permitting, and finish work all have to align with the model’s specifications before the first cook. Uniquecompanies handles every step of that process for homeowners in the Phoenix metro area, from grill selection and cutout planning through island construction, utility rough-in, and final installation. With over 24 years of experience building custom outdoor kitchens in Phoenix, the team brings design visualization tools, in-house permitting, and material expertise specific to Arizona’s climate to every project.
If you’re ready to move from shortlist to finished outdoor kitchen, contact Uniquecompanies to schedule a site consultation. The design process starts with your grill selection and works outward from there, so nothing gets built to the wrong dimension.
Sources
Before finalizing a model or breaking ground on an island, these primary sources are worth reviewing directly and sharing with your installer or contractor.
- Code requirements for outdoor kitchens – ICC
- Built In Grill Buying Guide – Outdoor Kitchen Appliance
- Built-In Grill Buying Guide | Solavi Living