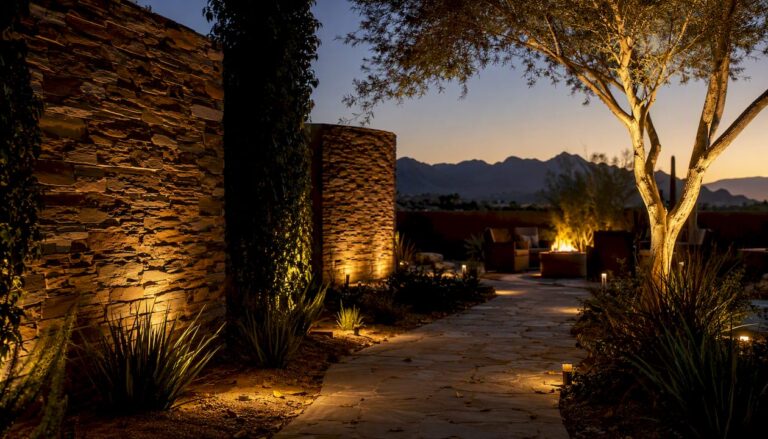
Start by layering warm, low-voltage LED fixtures along paths and around focal points — that single step delivers both safety and visual drama without overcomplicating the project. The most effective approach follows IES (Illuminating Engineering Society) layering principles: ambient light for general visibility, accent light for focal points, and task light for functional zones like steps and cooking areas. For Phoenix-area homeowners who want a fully integrated result, Uniquecompanies designs and installs complete lighting systems as part of custom outdoor builds.
Before buying a single fixture, run through this starter checklist:
- Call 811 before any digging to locate underground utilities.
- Install GFCI protection on all outdoor circuits — required by the National Electrical Code for outdoor receptacles.
- Walk your property after dark to identify which trees, walls, and paths actually need light versus which ones look fine without it.
Key Takeaways
| Point | Details |
|---|---|
| Layer with hierarchy | Establish one or two dominant focal points first; build path and fill lighting around them. |
| Use the 4:1 contrast ratio | Keep the brightest area no more than four times brighter than the darkest for visual comfort. |
| Size the transformer correctly | Total fixture wattage plus a 25% buffer prevents overloads and voltage drop on long runs. |
| Call 811 and use GFCI | Both are non-negotiable safety steps before any digging or outdoor circuit work. |
| Uniquecompanies for full integration | Uniquecompanies designs and installs complete, warrantied lighting systems as part of custom Phoenix outdoor builds. |
Table of Contents
- What Are the Best Landscape Lighting Ideas for Your Yard?
- Design principles that make outdoor lighting look intentional
- Which fixture types and technologies should you choose?
- How to plan your landscape lighting layout step by step
- Basic installation steps and safety essentials
- What does landscape lighting typically cost?
- How to maintain your system and fix common problems
- When does it make sense to hire a professional?
- What most homeowners underestimate about outdoor lighting
- Uniquecompanies designs complete outdoor lighting as part of every build
- Sources
What Are the Best Landscape Lighting Ideas for Your Yard?
The ideas below are organized by location and effect. Each entry notes what problem it solves and whether the result reads as warm and subtle or bold and dramatic.
- Uplight a specimen tree. Aim two or three narrow-beam fixtures around the trunk to reveal bark texture and canopy shape. Warm and dramatic; works best on oaks, palms, and multi-trunk desert trees.
- Path lights along a walkway. Stake low bollard or mushroom-cap fixtures at intervals designed to guide foot traffic safely. Warm and functional; pairs well with flagstone or decomposed granite paths.
- Wall grazing on a stone or stucco facade. Mount fixtures within 18 inches of the surface and aim upward with a narrow beam to pull out texture. Subtle and architectural; transforms a flat wall into a focal point after dark.
- Silhouette a sculptural plant. Place a fixture behind a saguaro, agave, or ornamental grass and aim it at the wall or fence behind the plant. Bold and graphic; especially effective against light-colored stucco.
- Step lights recessed into risers. Embed small LED fixtures into each stair riser for clean, low-profile safety lighting. Functional and modern; nearly invisible during the day.
- Well lights in a lawn or planting bed. In-ground fixtures flush with grade uplight trees or architectural columns without visible hardware. Clean and polished; the preferred choice for high-end installs.
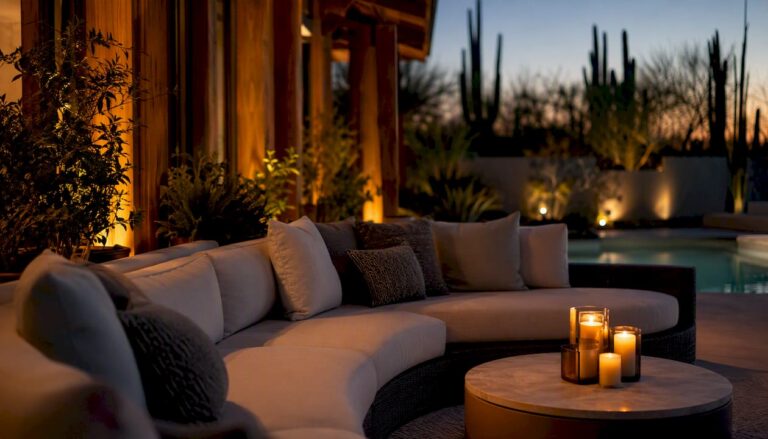
- String or catenary lights over a patio. Drape warm-white Edison-style LED strands between posts or pergola beams. Casual and inviting; sets the mood for outdoor dining and entertaining.
- Underwater pool and spa lighting. Submersible LED fixtures in color-changing or fixed warm white illuminate water features from below. Dramatic and resort-like; pool lighting design works best when coordinated with surrounding deck and planting lights.
- Downlighting from a tree canopy (“moonlighting”). Mount fixtures high in a mature tree and aim downward through branches to cast dappled shadow patterns on the ground. Soft and naturalistic; mimics moonlight convincingly.
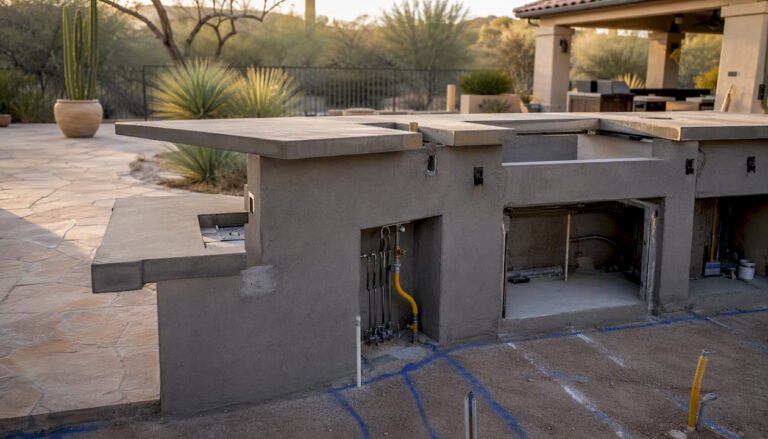
- Accent lighting on an outdoor kitchen. Under-counter LED strip lights and pendant-style overhead fixtures combine task lighting with ambiance. Practical and polished; outdoor kitchen lighting is often overlooked until the kitchen is already built.
- Hardscape wall wash. Direct a wide-beam fixture across a retaining wall or raised planter to wash the surface evenly. Subtle and spatial; makes a yard feel larger at night.
- Security-focused accent lighting. Motion-activated spotlights at entry points and dark corners deter intrusion without the harsh floodlight look. Functional and discreet; choose fixtures with adjustable sensitivity and warm-white output to avoid the industrial feel.
- Bollard lights at a driveway edge. Taller post-top fixtures mark the driveway boundary and add curb appeal. Clean and welcoming; effective even without additional landscape plantings nearby.
- Focal-point lighting on a water feature or sculpture. A single well-aimed spotlight on a fountain, boulder, or art piece creates an immediate visual anchor. Dramatic and intentional; one well-placed fixture often does more than six poorly aimed ones.
Pro Tip: Before finalizing any placement, set up a portable work light or a flashlight at the proposed fixture location after dark and walk to the main viewing points — your front door, the patio seating area, and the street. What you see from those angles is what matters.
Design principles that make outdoor lighting look intentional
The single most important rule in outdoor lighting design is layering with a clear hierarchy: establish one or two dominant focal points, then build secondary and fill layers around them. Without hierarchy, every element competes for attention and the result looks cluttered rather than composed.
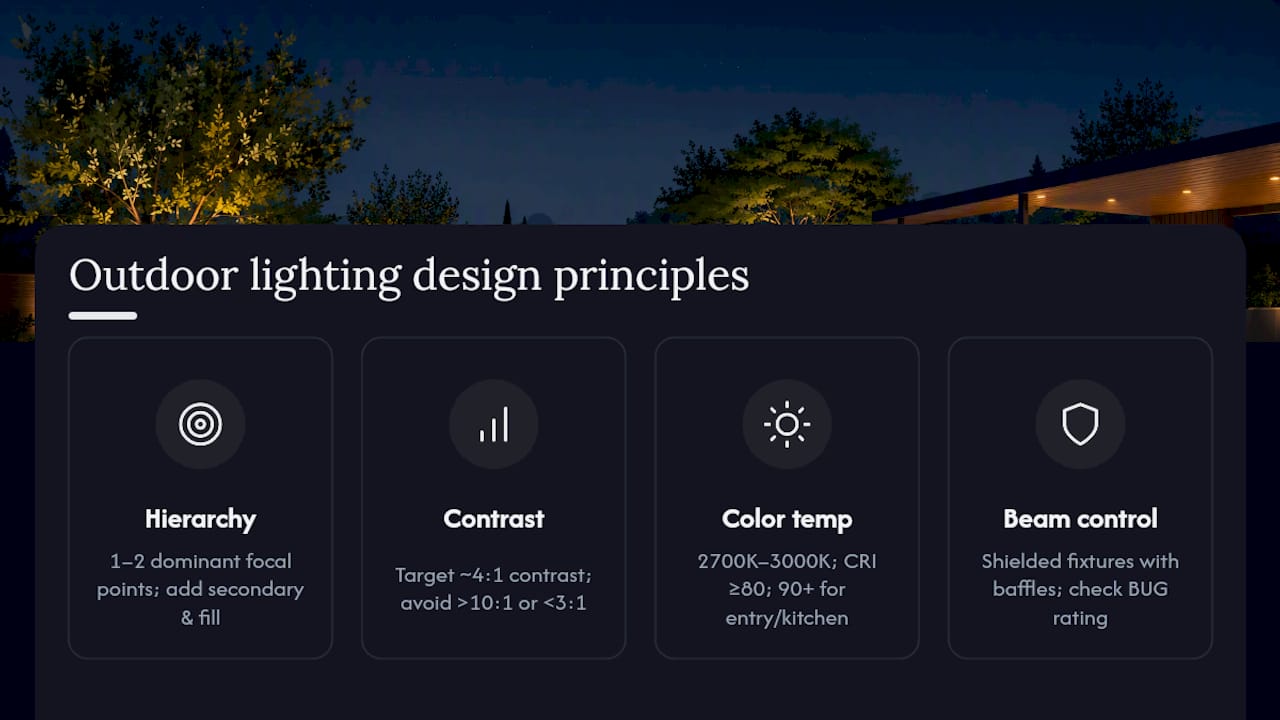
Contrast ratio. Lighting professionals recommend a contrast ratio near 4:1 between the brightest and darkest areas of a scene. That ratio preserves visual comfort and guides the eye naturally from one space to the next. Push beyond 10:1 and the bright spots start to feel harsh; drop below 3:1 and the composition loses depth.
Color temperature. Designers consistently recommend 2700K–3000K for residential landscapes. That range reads as warm white, flatters most plant colors and stone finishes, and reduces disruption to nearby wildlife. Color Rendering Index (CRI) should be 80 or above; 90+ is worth the small premium for high-visibility areas like an entry or outdoor kitchen.
Beam control and glare shielding. A fixture that throws light where you want it and nowhere else is the mark of a well-designed system. Shielded fixtures with internal baffles prevent glare at eye level, which matters especially along paths and near seating areas. The BUG (Backlight, Uplight, Glare) rating system gives you a standardized way to compare fixtures on light trespass and sky glow before you buy.
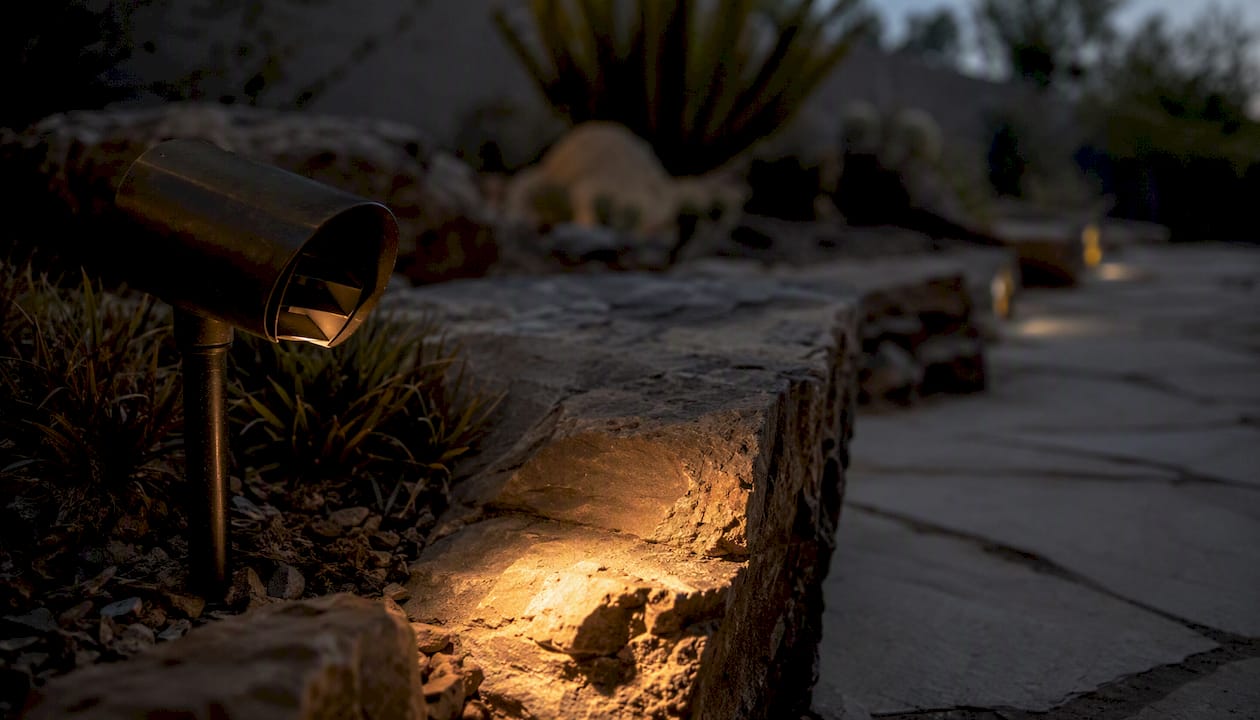
Grazing and backlighting. Best-practice design guidance emphasizes targeted techniques — grazing, silhouetting, and backlighting — to create depth without adding raw lumens. Grazing works best when fixtures are positioned close to the wall or textured surface, using a narrow beam at low mounting height to maximize texture reveal.
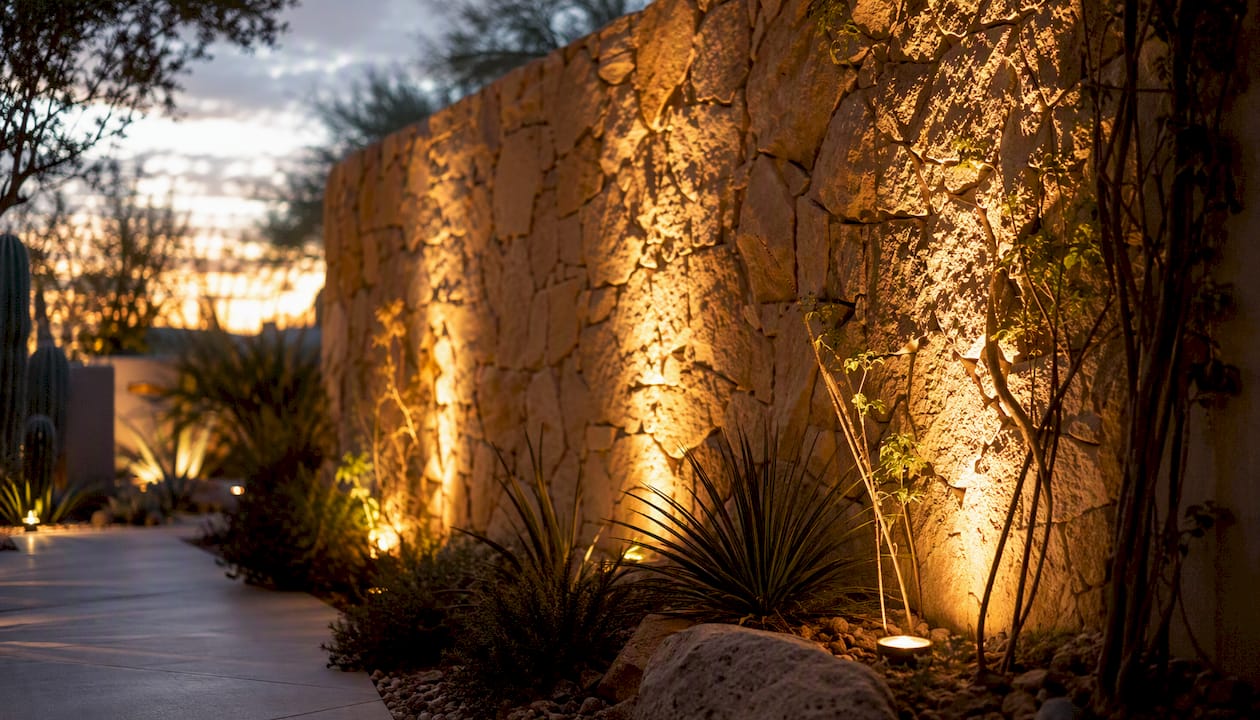
Pro Tip: Aim every fixture so the beam center lands on the object’s most interesting feature — the mid-trunk of a tree, the cap of a wall, the center of a doorway — not at the base. Lighting the base of a tree illuminates the dirt, not the tree.
Which fixture types and technologies should you choose?
Low-voltage LEDs (12V or 24V) are the right choice for most residential projects. They consume a fraction of the energy of older halogen systems, last significantly longer, and the U.S. Department of Energy confirms that LEDs combined with automated controls materially reduce operating costs versus older lamp technologies. Solar fixtures are a practical option only for very low-use runs — a single accent light in a remote corner — where running wire is impractical.
Fixture selection checklist:
- Beam angle: Narrow (8–15°) for spotlighting trees and architecture; medium (25–40°) for path lights and general accent; wide (60°+) for wall washing and flood applications.
- Lumen output: Path lights typically need 40–100 lumens; accent uplights 200–400 lumens; security spots 700–1,200 lumens.
- IP rating: IP65 minimum for above-grade fixtures; IP67 or IP68 for in-ground or near-water applications.
- CRI: 80 minimum; 90+ for kitchens, entries, and feature areas.
- Color temperature: 2700K–3000K for warmth; 4000K only for security or commercial applications.
- BUG rating: Choose fixtures with low Glare and Uplight ratings to minimize light trespass onto neighboring properties.
Fixture types at a glance:
- Uplights/spotlights: Directional, adjustable; used for trees, architecture, and sculpture. Lighting educators advise using multiple fixtures around a tree to reveal three-dimensional form, and note that converting from halogen to LED requires rethinking beam spreads — LED beams are typically tighter for the same wattage.
- Path lights: Stake-mounted bollards or mushroom caps; self-shielding designs prevent glare at eye level.
- Well lights: In-ground, flush-mount; clean aesthetic for high-end installs; require proper drainage to prevent water intrusion.
- Step lights: Recessed into risers or side walls; low-lumen output is sufficient and preferred.
- Strip/linear LED: Under-counter, under-cap, or cove applications; choose outdoor-rated (IP65+) strips only.
- String/catenary: Decorative overhead; use LED filament types rated for outdoor use; support on a dedicated cable, not the power cord.
- Smart controls: Wi-Fi or Zigbee-based controllers (such as those compatible with Lutron Caseta or similar platforms) allow scheduling, dimming, and zone control from a phone. Pair with photocell sensors and motion detectors for hands-free operation.
Kichler and VOLT are two widely referenced manufacturer resources for residential landscape lighting. Kichler publishes a landscape lighting guide with project examples and fixture selection guidance. VOLT is known for direct-to-consumer low-voltage systems with detailed installation documentation. Both are useful starting points when comparing fixture specifications and warranty terms.
How to plan your landscape lighting layout step by step
Plan before you buy. Walking your property after dark and mapping what you see is the single most useful planning step — it reveals which features actually read at night and which disappear.
- Walk the site at night. Bring a flashlight and note which trees, walls, paths, and entry points feel dark or unsafe. Mark them on a simple sketch.
- Identify key viewpoints. Determine where you and your guests will most often see the yard: the main patio, the kitchen window, the street. Design for those sightlines first.
- Define lighting zones. Group fixtures by function: entry/security, pathway, accent/focal, and entertainment. Each zone can be controlled independently.
- Select focal points. Choose two to four dominant features — a specimen tree, a water feature, the front facade — and plan your highest-lumen fixtures for those.
- Calculate transformer size. Add up the wattage of all planned fixtures, then size the transformer with a margin to ensure safe, reliable operation. Parker Electric’s DIY guide outlines this calculation alongside wiring and testing steps.
- Plan wire runs. Sketch cable routes from the transformer to each zone, keeping runs as short as practical to minimize voltage drop. For runs longer than 100 feet, use 10-gauge wire or a hub-and-spoke layout.
- Choose controls. A simple mechanical timer handles most systems. For larger or multi-zone installs, a photocell plus a digital timer or smart controller gives more flexibility. Motion sensors add security coverage without keeping lights on all night.
For spacing guidance: path lights work well at 6–8 foot intervals on straight runs; tighter spacing (4–5 feet) suits curved paths or areas with dense plantings. The 4:1 contrast ratio guidance applies here too — avoid placing path lights so close together that the path glows uniformly, which flattens the visual effect.
Basic installation steps and safety essentials
Many homeowners can install a simple low-voltage system in a weekend if they follow code and safety steps. Line-voltage (120V) work, however, requires a licensed electrician in most jurisdictions.
Numbered installation steps:
- Finalize your plan and fixture list. Confirm transformer size, wire gauge, and fixture locations before purchasing.
- Call 811. Contact the national “Call Before You Dig” service at least three business days before any digging. This is not optional — hitting a buried utility line is dangerous and costly.
- Mount the transformer. Install it on an exterior wall near a GFCI-protected outdoor outlet, at least 12 inches above grade. Plug into the GFCI outlet; do not hardwire unless a licensed electrician performs that step.
- Run cable. Lay low-voltage cable along planned routes before burying. The National Electrical Code requires burial at a minimum of 6 inches for low-voltage landscape cable; local codes may require more.
- Connect fixtures. Use manufacturer-supplied waterproof connectors or direct-burial wire nuts rated for outdoor use. Never use standard indoor wire nuts outdoors.
- Test before burying. Power the system and verify each fixture operates correctly. Check for voltage drop at the farthest fixture — if output is noticeably dimmer than fixtures near the transformer, adjust wire gauge or shorten the run.
- Aim fixtures. Adjust beam direction while the system is live. This is the step most DIYers rush, and it is where professional results diverge from amateur ones.
- Backfill and secure. Bury cable to the required depth, tamp soil, and secure any surface-run sections with landscape staples.
Safety checklist:
- GFCI protection on all outdoor circuits — required by code and a critical safety step.
- Never hot-plug LED fixtures into a live transformer; always power down before connecting or disconnecting.
- Use only IP65+ rated connectors and fixtures for above-grade outdoor applications.
- Check local permit requirements before installation; some municipalities require a permit even for low-voltage systems.
- Keep all connections above the soil line where possible, or use direct-burial-rated connectors when connections must be buried.
A basic DIY low-voltage install typically takes 4–8 hours for a small to medium yard. Errors in wire sizing or connector quality are the most common sources of callbacks and added cost. For guidance on how outdoor lighting affects property safety and wayfinding, the design considerations extend beyond aesthetics.
What does landscape lighting typically cost?
Materials cost for DIY low-voltage systems is generally lower than professional installation, though professional jobs include materials and labor combined, based on industry cost data from Parker Electric. Those ranges exclude high-end commercial-grade fixtures and complex electrical work, which can push costs higher.
| Cost Component | DIY Estimate | Professional Estimate |
|---|---|---|
| Materials (wire, connectors, fixtures) | $3–$8 per linear foot | Included in labor rate |
| Professional labor | Not applicable | $8–$15 per linear foot |
| Transformer (100W) | $80 | Included or itemized |
| Basic tool kit (trencher rental, connectors) | $50 one-time | Not applicable |
| Typical small yard project | $200 total | $400 total |
Budgeting considerations:
- Fixture quality directly affects longevity. Commercial-grade brass or copper fixtures outlast plastic equivalents by years in harsh climates like Phoenix.
- Factor in warranty coverage. Professional systems often include warranties and design services that DIY kits do not.
- LED operating costs are substantially lower than halogen over a 5-year period. The energy savings often offset the higher upfront fixture cost within two to three seasons.
- Budget a 15–20% contingency for unexpected wire reroutes, additional fixtures after the first night walk-through, or permit fees.
How to maintain your system and fix common problems
Routine seasonal checks prevent most landscape lighting failures. Clean lenses, inspect connections, and verify voltage at the farthest fixture at least twice a year — once in spring and once before the monsoon season in Arizona.
Troubleshooting checklist:
- Flickering fixtures: Check the connector at the fixture first. Loose or corroded connections are the most common cause. Re-seat or replace the connector.
- Dimming on a run: Measure voltage at the farthest fixture. If it reads below 10.8V (for a 12V system), the run is too long for the wire gauge. Add a second home-run cable or upgrade to 10-gauge wire.
- Dead run (no fixtures on a circuit): Check the transformer’s circuit breaker or fuse first, then trace the cable for a cut or disconnected splice.
- Sensor or timer not triggering: Verify the photocell is not obstructed by foliage or debris. Reset the timer after power outages — many digital timers lose their schedule when power is interrupted.
- Water intrusion in a well light: Confirm the fixture’s drainage hole is clear. In clay soils, install a gravel bed beneath the fixture to improve drainage.
- Corrosion on connectors: Replace with marine-grade or direct-burial-rated connectors. In humid or high-irrigation zones, apply dielectric grease at each connection point.
Seasonal maintenance notes:
- Spring: Clean lenses with a soft cloth and mild cleaner. Inspect all above-grade connectors for corrosion. Adjust aim on any fixtures shifted by winter frost heave or landscaping work.
- Pre-monsoon (Arizona): Secure any loose cable runs before heavy rain. Verify that all well-light drainage is clear. Check that transformer enclosures are sealed.
- Fall: Trim any plant growth that has grown over or into fixture housings. Recheck transformer load if new fixtures were added during the season.
When does it make sense to hire a professional?
Hire a professional for complex layouts, permitting requirements, integration with pools or smart-home controls, commercial-grade fixture specifications, or any project where you want a warrantied, long-lasting result. Professional installation delivers better long-term value through durable fixtures, correct wiring, permit handling, and cohesive design that DIY kits typically cannot match.
Contractor vetting checklist:
- Offers a design consultation and site walk before quoting.
- Provides load calculations and transformer sizing documentation.
- Handles permits where required by local jurisdiction.
- Specifies fixture brand, model, and warranty terms in writing.
- Uses commercial-grade fixtures (brass, copper, or marine-grade aluminum) rather than plastic.
- Provides a portfolio or references for comparable projects.
- Offers 3D visualization or a lighting plan drawing before installation begins.
Projects that typically require a professional:
- Large estates with 30+ fixtures across multiple zones.
- Full integration of lighting with pool, spa, and hardscape in a single design-build scope.
- Line-voltage (120V) circuits, including security lighting tied to the main panel.
- Smart-home integration requiring low-voltage control wiring alongside lighting cable.
- Projects in HOA communities where permit documentation is required for approval.
For homeowners combining lighting with custom hardscape designs, coordinating both scopes under one contractor avoids the common problem of lighting conduit being buried after hardscape is already poured.
What most homeowners underestimate about outdoor lighting
The gap between a lighting plan that looks good on paper and one that actually works at night comes down to one thing: hidden sources. When you can see the fixture, you are looking at the hardware, not the effect. The best residential systems keep every fixture below the sightline, tucked behind a plant, recessed into a wall, or shielded by a shroud. The light appears to come from the landscape itself.
The second underestimated factor is restraint. Homeowners tend to add fixtures until the yard feels bright enough, which usually means adding too many. Start with fewer fixtures than you think you need, live with the result for a week, and add selectively.
Uniquecompanies has spent over 24 years integrating lighting into full outdoor living builds across the Phoenix metro. The consistent finding is that the projects that age best are the ones where lighting was planned alongside the hardscape and planting, not added afterward. Conduit placement, transformer location, and fixture selection all interact with the broader design in ways that are difficult to retrofit cleanly.
Uniquecompanies designs complete outdoor lighting as part of every build
Uniquecompanies brings lighting design into the project from day one, not as an afterthought. For Phoenix-area homeowners who want a warrantied, fully integrated system, that means one team handles design, permitting, installation, and coordination with pools, kitchens, and hardscape.

Services included in a Uniquecompanies outdoor lighting build:
- Full lighting design with zone planning and fixture specification.
- Permit handling and load calculations.
- Professional installation with commercial-grade fixtures.
- 3D visualization so you see the result before any digging begins.
- Integration with custom pool features and outdoor kitchen lighting in a single coordinated scope.
- Post-installation walkthrough and system documentation.
For homeowners planning a full backyard build or a lighting-focused upgrade, the next step is a design consultation. Visit Uniquecompanies’ landscape lighting service page to review project examples and request a quote.
Sources
- Alcon Lighting — Landscape lighting guide & best practices
- How to install landscape lighting (DIY tips) — Parker Electric Co.
- Best practices in landscape lighting design — GLTE (PDF)
- U.S. Department of Energy — Energy efficiency resources
- The Art of Landscape Lighting — Janet Lennox Moyer (Designers Lighting Forum PDF)